Blog
DIY Floating Nightstand: A Simple Guide to Elevate Your Bedroom

Tired of cluttered bedside tables? A DIY floating nightstand is the perfect solution to add a touch of modern elegance and functionality to your bedroom. This project is surprisingly simple, even for beginner DIY enthusiasts. In this comprehensive guide, we’ll walk you through each step, from material selection to the final touches, ensuring you create a beautiful and sturdy floating nightstand you’ll cherish for years to come.
Materials You’ll Need
- For the Nightstand Shell:
- (2) 1×12 lumber @ 24″ (top and bottom)
- (2) 1×12 lumber @ 11 1/2″ (sides)
- (1) 1×4 lumber @ 22 1/2″ (back support)
- For the Drawers:
- (4) 1×4 lumber @ 20″ (drawer fronts and backs)
- (4) 1×4 lumber @ 9 3/4″ (drawer sides)
- (2) 1/4″ plywood or hardboard cut to 9 3/4″ x 21 1/2″ (drawer bottoms)
- (2) 1/2″ x 6″ poplar hobby stock @ 22 1/4″ (drawer faces)
- Hardware and Fasteners:
- (2) 10″ full-extension drawer slides
- 1-1/4″ pocket hole screws
- 1-1/4″ screws to attach drawer faces
- Wood glue
- Finishing products (stain, paint, wax, polyurethane)
- Knobs or pulls
Tools You’ll Need
- Miter saw
- Table saw
- Drill
- Pocket hole jig
- Sander and sandpaper
- Paintbrushes and rags
- Measuring tape
- Carpenter’s square
- Stud finder
- Pencil
Step-by-Step Instructions
1. Building the Nightstand Shell
- Cut the Lumber: Begin by cutting your 1×12 lumber into the required sizes for the top, bottom, and sides of the nightstand.
- Create Pocket Holes: Drill four pocket holes on both ends of the shorter pieces (the sides) of the nightstand.
- Assemble the Shell: Using 1 1/4″ pocket hole screws, assemble the shell of the nightstand. Ensure the pocket holes face inward for a clean finish.
- Attach Back Support: Cut a 1×4 to 22.5″ and attach it to the back of the shell using pocket holes. This piece will be used to mount the nightstand to the wall, so ensure it sits flush.
2. Assembling the Drawers
- Cut Drawer Pieces: Cut your 1×4 lumber for the drawer fronts, backs, and sides according to the measurements provided.
- Assemble Drawer Boxes: Use pocket holes and wood glue to assemble the drawer boxes. The pocket holes on the front pieces will be hidden by the drawer faces.
- Attach Drawer Bottoms: Secure the drawer bottoms using wood glue and nails or staples.
3. Installing the Drawer Slides
- Attach Slides to Drawers: Install the drawer slides to the sides of the drawer boxes, following the manufacturer’s instructions.
- Attach Slides to Nightstand: Screw the other side of the drawer slides to the inside of the nightstand shell. Ensure you leave enough space for the drawer faces to sit flush with the front.
4. Adding the Finishing Touches
- Prepare Drawer Faces: Cut the drawer faces to size and apply your chosen finish. Sanding and staining or painting will enhance the final look.
- Finish the Nightstand: Sand the entire nightstand and apply your preferred paint or stain. Consider a protective coat of polyurethane for durability.
- Attach Drawer Faces: Once the finish is dry, attach the drawer faces to the drawer boxes using wood glue and screws.
- Install Knobs or Pulls: Mark and drill holes for your chosen knobs or pulls, and install them on the drawer faces.
5. Mounting the Nightstand
- Mark Stud Locations: Hold the nightstand at your desired height on the wall and use a stud finder to mark the stud locations.
- Drill Pilot Holes: Drill pilot holes through the back support of the nightstand into the marked stud locations.
- Secure to the Wall: Use screws to firmly secure the nightstand to the wall through the pilot holes.
Tips and Tricks
- Use Scrap Wood: Utilize leftover wood pieces to minimize costs and reduce waste.
- Measure Twice, Cut Once: Accurate measurements are crucial for a successful outcome.
- Pre-Drilling: Pre-drilling holes can prevent wood from splitting when inserting screws.
- Leveling: Ensure the nightstand is level when mounting it to the wall.
- Personalization: Get creative with paint colors, stains, and knobs to match your unique style.
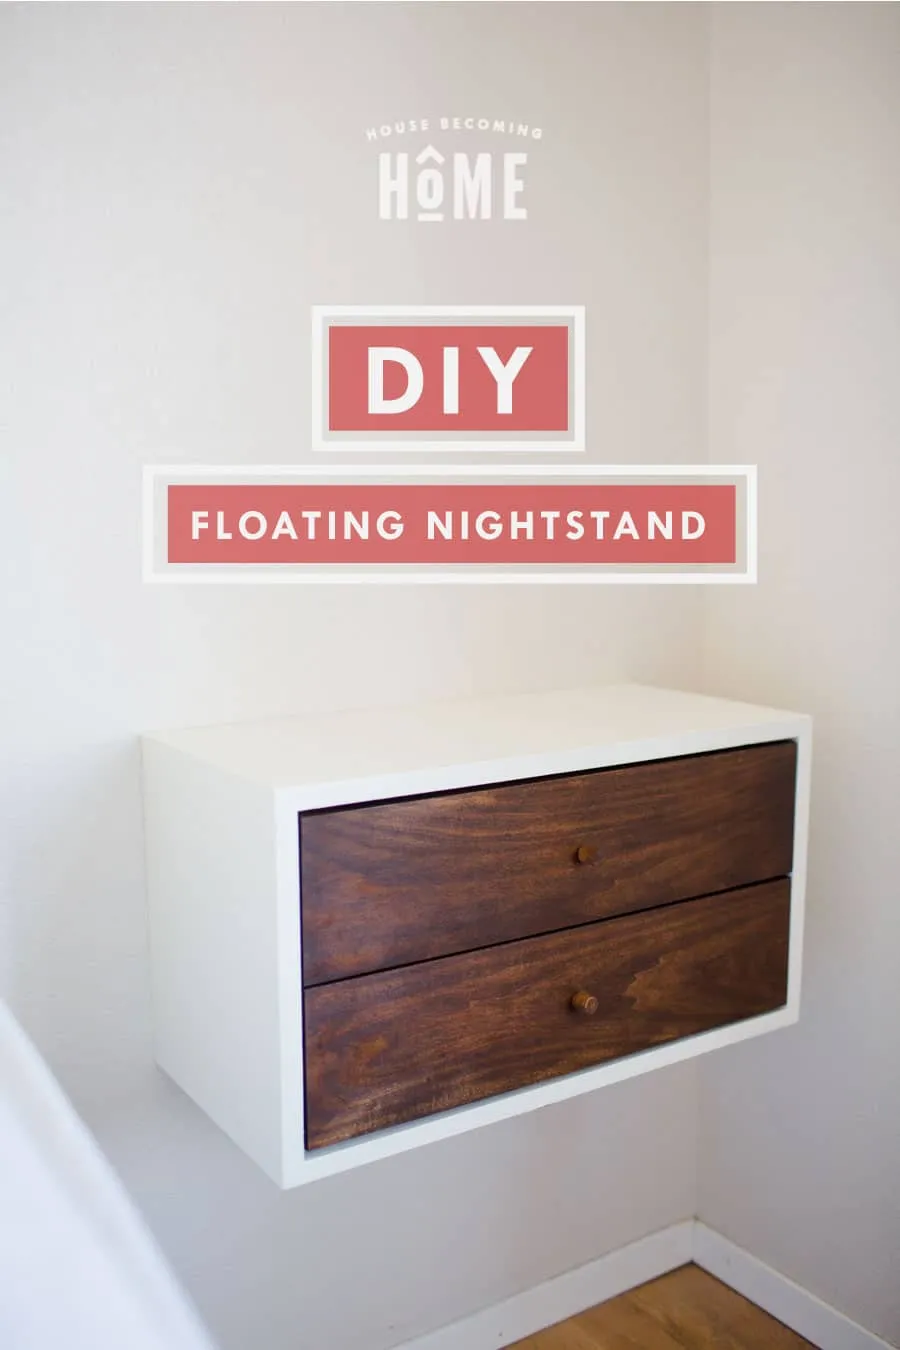
 DIY Floating Nightstand with two drawers
Conclusion
Building a DIY floating nightstand is a rewarding project that elevates both the functionality and aesthetics of your bedroom. With a little patience and these detailed instructions, you can create a beautiful and unique piece that perfectly reflects your style while adding valuable storage space. Now, grab your tools and let your creativity flow!
Ready to explore more unique handmade treasures? Visit Robert Kline Art and discover exceptional handcrafted gifts for your loved ones or add a touch of artisanal charm to your own home.
