Blog
Build Your Own DIY Floating Entryway Shelf with Hooks

Looking for a simple yet stylish way to organize your entryway and add a touch of personality? Look no further than a DIY floating entryway shelf with hooks. This project is perfect for beginners and can be completed in just a few hours. Imagine the satisfaction of hanging your coat and keys on a piece of functional art you created yourself. Let’s get started!
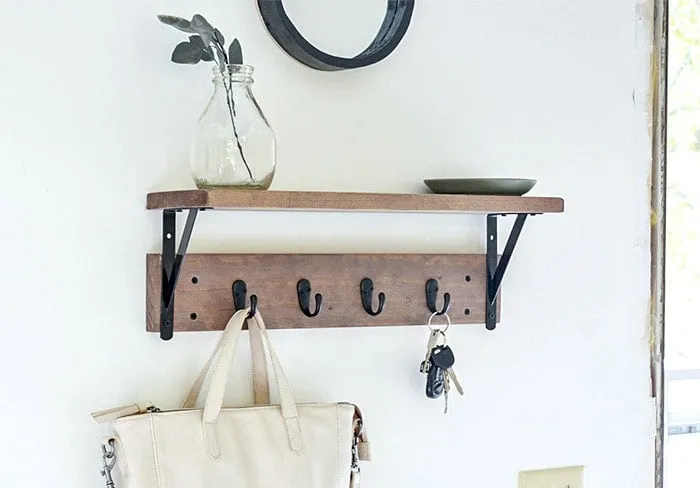
 closeup of DIY Entryway shelf with hooks
Gathering Your Tools and Materials
Before we dive in, gather your tools and materials. Having everything ready will make the process smoother and more enjoyable. Here’s what you’ll need:
Materials:
- (1) 1″ x 4″ x 2′ board (for the bottom shelf)
- (1) 1″ x 6″ x 2′ board (for the top shelf)
- Black shelf brackets
- Black hooks
- Wood stain of your choice
- Polyurethane
- Screws
Tools:
- Power drill
- Miter saw or miter box
- Sandpaper
- Measuring tape
- Pencil
Step-by-Step Guide
Follow these straightforward steps to build your own floating entryway shelf:
Step 1: Measure and Cut
- Using your measuring tape and pencil, mark the desired length of your shelves on the boards (for example, 20 inches).
- Use a miter saw or miter box to make precise cuts.
Step 2: Sand and Finish
- Smooth out any rough edges on your shelves with sandpaper.
- Apply your chosen wood stain according to the manufacturer’s instructions. This will add a touch of personalized style to your shelf.
- Once the stain has dried, seal the shelves with a coat of polyurethane to protect the wood and enhance its natural beauty.
Step 3: Install the Hooks
- Determine the placement of your hooks on the bottom board, ensuring they’re evenly spaced.
- Pre-drill pilot holes for the hooks to prevent the wood from splitting when you screw them in.
- Attach the hooks securely.
Step 4: Attach the Shelf Brackets
- Position the shelf brackets on the bottom of the top shelf, ensuring they are level and evenly spaced.
- Mark the screw holes with a pencil and pre-drill pilot holes.
- Attach the brackets using screws.
Step 5: Secure to the Wall
- Determine the placement of your shelf on the wall and mark the spots for your screws. Be sure to use a level to ensure the shelf will hang straight.
- Pre-drill holes at the marked spots, then align the shelf brackets with the holes and screw the shelf securely to the wall.
Conclusion
Congratulations on creating your very own floating entryway shelf with hooks! You’ve transformed a simple space into a functional and stylish part of your home, demonstrating the power of DIY. Don’t hesitate to experiment with different types of wood, stain colors, and hooks to create a shelf unique to your style. Be sure to show off your work and inspire others to embark on their own creative endeavors. Head over to Robert Kline Art to discover more inspiring DIY projects and craft ideas to beautify your home.
