Blog
Build Your Own Kayak Rack: A DIY Project for Easy Storage
Tired of your kayak cluttering up your garage or shed? At Robert Kline Art, we believe in the power of DIY, and that includes practical storage solutions! Building a kayak rack is easier than you think, and it’s a rewarding project that will free up valuable space.
This step-by-step guide will walk you through creating a sturdy and customizable kayak rack that fits your needs. Let’s dive in!
Tools and Materials You’ll Need
Before we start, gather the following tools and materials:
Tools:
- 1/8-in. drill bit
- Drill or impact driver
- Miter saw
- Pencil
- Speed square
- Tape measure
- Utility knife
Materials:
- 2×4 dimensional lumber – 8-ft. long (2)
- 2×6 dimensional lumber – 8-ft. long
- 3-in. deck screws
- 4×4 post – 8-ft. long
- Wood glue or all-purpose glue
- Yoga mat, pool noodle, or other padding
Building Your Kayak Rack: Step-by-Step Guide
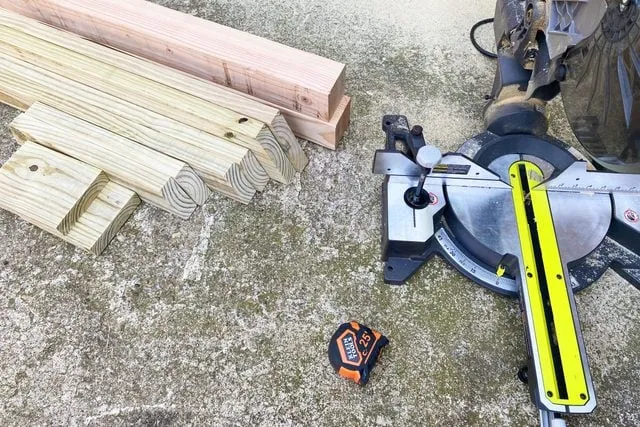
Step 1: Cut the Lumber to Size
- 4×4 Posts: Cut the 8-foot 4×4 post in half, resulting in two 4-foot posts for your uprights.
- 2×6 Bottom Racks: Cut the 2×6 lumber into the following pieces:
- Two 32-inch pieces, mitered at 22.5 degrees on one end. These will be your main bottom racks.
- Two 7 1/2-inch pieces for the bottom rack feet.
- 2×4 Top Racks and Braces: Cut the 2×4 lumber as follows:
- Two 28-inch pieces, mitered 22.5 degrees on one end for the top racks.
- Four 18-inch pieces, mitered 22.5 degrees on both ends. These are the feet for the uprights.
- Two 20-inch pieces, mitered 45 degrees on both ends. These will act as your cross braces.
Pro Tip: When mitering the 2×4 cross braces and feet, angle both cuts inward, resembling the shape of a boat’s hull (__/ ).
 Cut Lumber
Step 2: Assemble the Uprights
- Attach the Feet: Stand a 4×4 post upright. Position two of the 18-inch 2×4 feet on either side of the post, long side down. Mark the top of the 2x4s on the post with a pencil to indicate placement.
- Secure with Screws: Lay the post flat. Align one foot support flush with the pencil line and the end of the post. Attach securely using deck screws. Flip the post and repeat this process for the other foot support. Repeat the entire process for the second upright post.
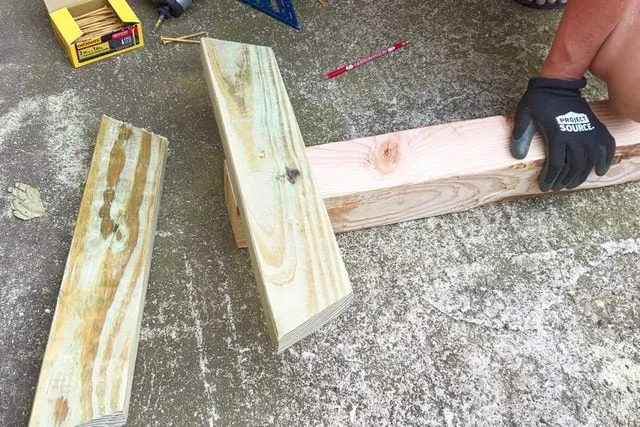 Add Feet To Uprights
Step 3: Construct the Bottom Racks
- Mark for the Feet: Measure 3 1/2 inches from one end of each short 2×6 piece. Mark this distance with a pencil and use a speed square to draw straight lines across the width of the board.
- Attach the Feet: Position a longer 2×6 piece on your work surface. Align one of the foot pieces near the mitered end, lining up your pencil marks with the bottom edge of the longer 2×6. Attach the foot using deck screws. Repeat this process for the other side, creating mirror images so that the feet will be on the inside of the completed rack.
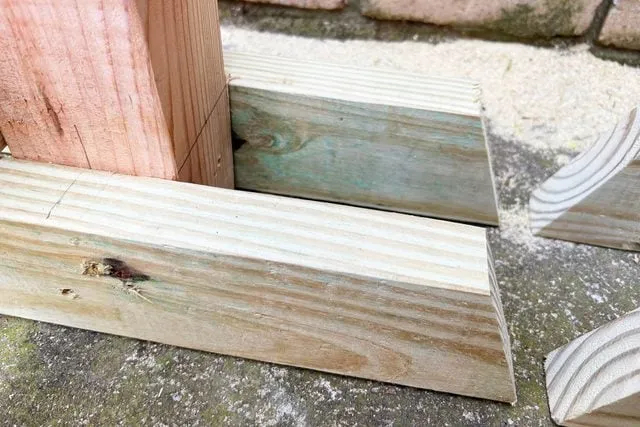 feet on posts
Step 4: Secure Bottom Racks to the Uprights
- Position the Racks: Stand the assembled 4×4 uprights side-by-side with the 2×4 feet pointing outwards. Place one 2×6 bottom rack (non-foot end) against the outside of an upright, resting it on the 2×4 feet.
- Attach and Repeat: Secure the bottom rack to the upright post using deck screws. Repeat this process on the other side, ensuring both bottom racks are attached to the outside of their respective posts.
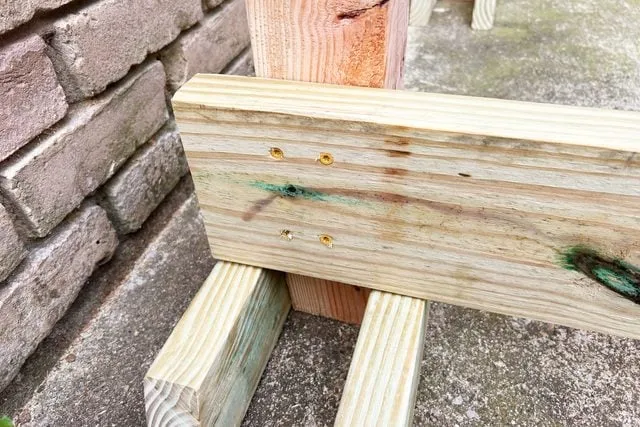 Add Bottom Racks To Uprights
Step 5: Add the Top Racks and Braces
- Mark Placement: Measure 20 to 24 inches from the top of the bottom racks (or adjust based on your kayak’s size). Mark this desired distance on the 4×4 upright posts.
- Attach Top Racks: Secure the 28-inch 2×4 top rack pieces at your pencil marks, ensuring they are at a 90-degree angle to the posts and on the outside.
- Install Cross Braces: Fit the 20-inch 2×4 cross braces under the top racks, attaching them to the sides of the uprights with screws. Pre-drill pilot holes to prevent the wood from splitting. Carefully screw the braces to the underside of the top racks as well.
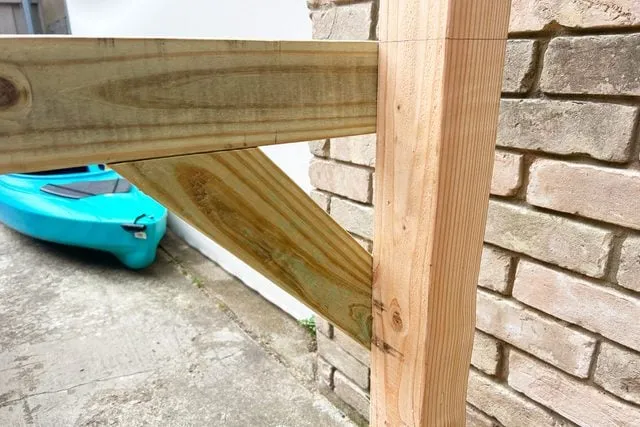 Add Cross Braces
 Add Cross Braces
Step 6: Add Padding and Load Your Kayaks!
- Cut the Padding: Cut your chosen padding material into four pieces that fit comfortably on the top racks. If using a yoga mat, use a utility knife to cut strips the width of the 2x4s. Pool noodles can be carefully cut lengthwise to fit.
- Secure and Enjoy: Glue the padding to the top racks, avoiding staples to prevent scratches to your kayak. Position the racks approximately five feet apart for a 10-foot kayak. Adjust as needed for larger vessels. Store your kayaks deck-side down to prevent water and debris from accumulating in the cockpit.
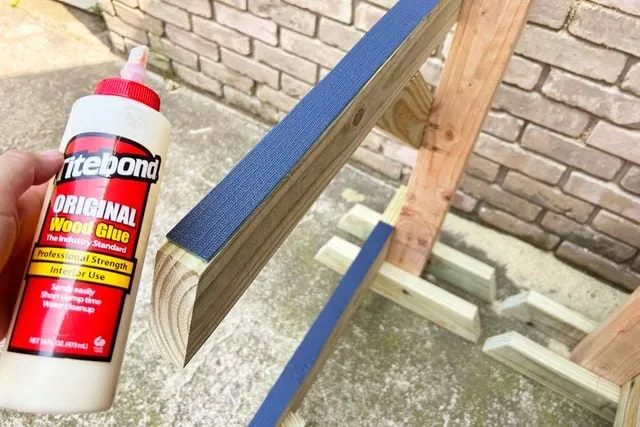 Kayak Rack Add Padding W Glue Diy Kayak Rack Ally Childress For Fhm Jvedit
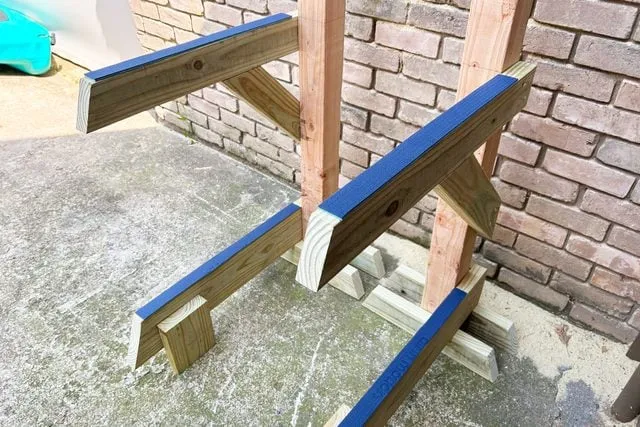 Kayak Rack Add Padding Diy Kayak Rack Ally Childress For Fhm Jvedit
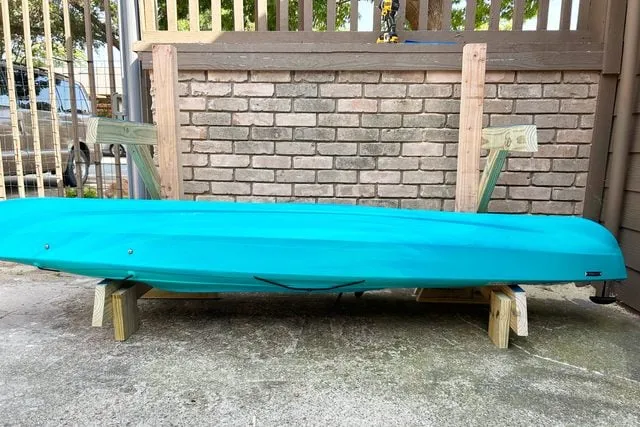 DIY Kayak Rack
Conclusion
Congratulations! You’ve just built a durable and functional DIY kayak rack. By tackling this project, you’ve not only gained valuable storage space but also the satisfaction of creating something with your own hands.
Looking for more creative DIY projects and inspiration? Explore the Robert Kline Art website for a wide array of unique handmade gifts and craft ideas! Share your kayak rack creations and connect with our community – we’d love to see your handiwork!
