Blog
Build Your Own DIY Kayak Rack: The Ultimate Storage Solution
Kayaking— a fantastic way to connect with nature, get some exercise, and explore hidden waterways. But let’s be honest, storing these water-loving vessels can be a real pain! Leaning them against the garage wall or tossing them in the shed just doesn’t cut it in the long run. What you need, my friend, is a dedicated kayak rack, and why shell out big bucks when you can build one yourself?
This guide will walk you through crafting a sturdy, cost-effective DIY kayak rack that will free up space and keep your kayaks safe and sound. Trust me, it’s easier than you think, even if you’re a beginner in the world of DIY! As an experienced craftsman, I’ve tackled my fair share of projects, and this one is both satisfying and practical. Let’s get started!
Tools and Materials: Gathering Your Arsenal
Before we dive in, let’s make sure you have everything you need. Here’s a handy list:
Tools
- 1/8-in. drill bit
- Drill or impact driver
- Miter saw
- Pencil
- Speed square
- Tape measure
- Utility knife
Materials
- 2×4 dimensional lumber – 8-ft. long (2)
- 2×6 dimensional lumber – 8-ft. long
- 3-in. deck screws
- 4×4 post – 8-ft. long
- Wood glue or all-purpose glue
- Yoga mat, pool noodle, or other padding (for protecting your kayak)
Step-by-Step Guide: Building Your Kayak Sanctuary
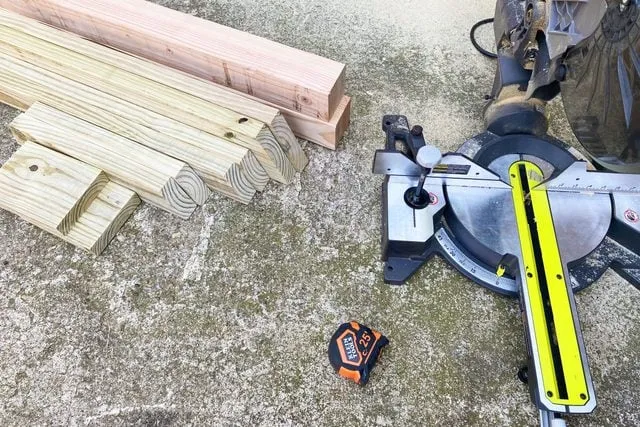
Step 1: Cut the Lumber to Size
- 4×4 Posts: Cut the 8-foot 4×4 posts in half, resulting in two 4-foot posts.
- 2×6 Bottom Racks: Cut the 8-foot 2×6 into:
- Two 32-inch pieces, mitering one end at 22.5 degrees. These will be the main bottom racks.
- Two 7 1/2-inch pieces to serve as the feet for the bottom racks.
- 2×4 Top Racks and Braces: Cut the 8-foot 2x4s into:
- Two 28-inch pieces, mitering one end at 22.5 degrees. These are your top racks.
- Four 18-inch pieces, mitering both ends at 22.5 degrees. These will be the feet for the uprights.
- Two 20-inch pieces, mitering both ends at 45 degrees. These are your cross braces.
Pro Tip: When mitering the 2×4 cross braces and feet, make sure both cuts angle inward, resembling the shape of a boat (__/).
 Cut Lumber
Caption: Start by cutting your lumber to the right sizes.
Step 2: Assemble the Upright Supports
- Mark the Feet Placement: Stand a 4×4 post upright. Position two of the 18-inch 2×4 feet on either side of the post, with the longer side facing down. Use a pencil to mark the top of the 2×4 feet on the post.
- Attach the Feet: Lay the post flat and align one foot with the pencil mark you made. Make sure it’s flush with the end of the post. Use deck screws to secure the foot to the post. Flip the post and repeat this process for the other foot. Repeat these steps for the second upright post.
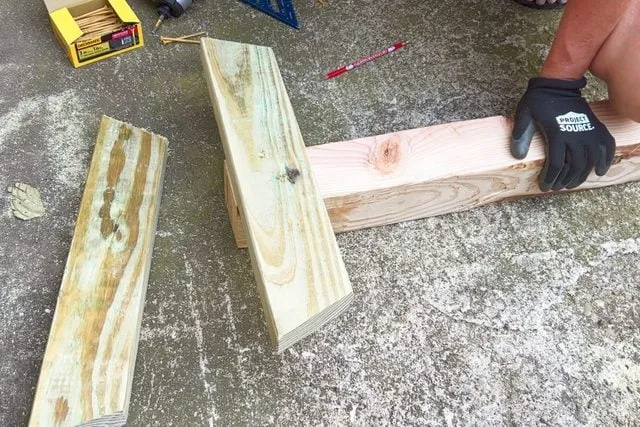 Add Feet To Uprights
Caption: Create a sturdy base by attaching the feet to your posts.
Step 3: Construct the Bottom Racks
- Mark for the Feet: On each of the shorter 2×6 pieces, measure 3 1/2 inches from one end and make a mark. Using a speed square, draw straight lines across the width of the 2×6 at your marks, extending the lines down the sides.
- Attach the Feet: Place one of the longer 2×6 pieces on your work surface. Align one of the 7 1/2-inch feet near the mitered end of the 2×6. Line up the pencil marks on the foot with the bottom edge of the 2×6. Secure the foot in place with deck screws. Repeat this process for the other 2×6, making sure the feet mirror each other so they’ll be on the inside of the completed rack.
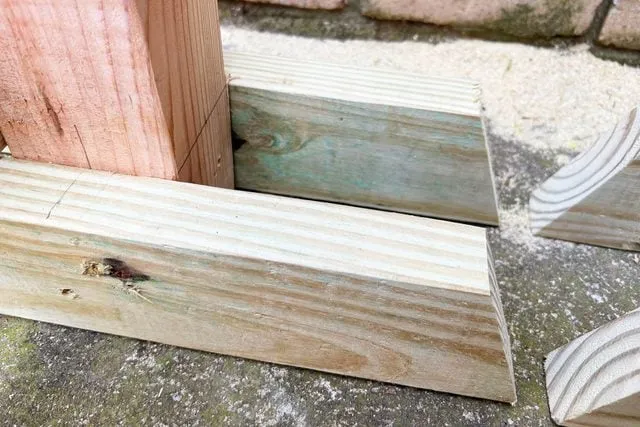 feet on posts
Caption: Precise measurements are key for a level kayak rack.
Step 4: Secure the Bottom Racks to the Uprights
- Position the Posts: Stand the two assembled 4×4 posts upright, side by side. Make sure the 2×4 feet are pointing outward so they’ll be perpendicular to the kayak support racks.
- Attach the Racks: Take one of the 2×6 bottom racks (the end without the foot) and position it against the outside of one of the posts, resting it on the two 2×4 feet. Use deck screws to attach the rack securely to the post. Repeat this process for the other post, ensuring the rack is on the outside.
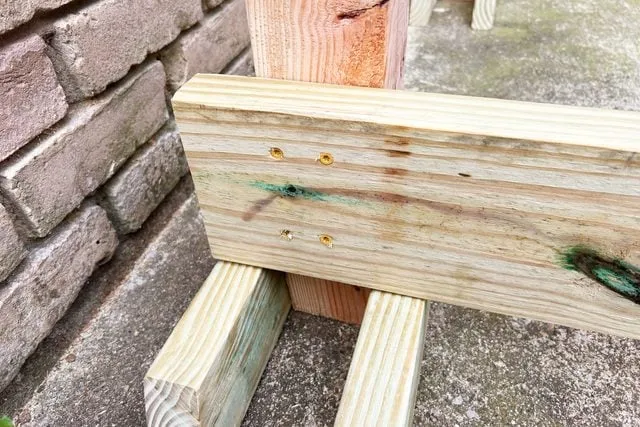 Add Bottom Racks To Uprights
Caption: With the uprights complete, it’s time to add the bottom racks.
Step 5: Add the Top Racks and Braces
- Mark the Top Rack Position: Determine the ideal spacing for your kayaks (typically 20-24 inches apart) and mark this distance on both 4×4 posts, measuring from the top of the bottom racks.
- Attach the Top Racks: Align the 2×4 top racks with your marks on the posts. They should be at a 90-degree angle to the posts and on the outside. Secure the top racks to the posts using deck screws.
- Install the Cross Braces: Fit the 20-inch 2×4 cross braces diagonally between the top racks and the posts. Pre-drill pilot holes to prevent the wood from splitting, then screw the braces securely to both the posts and the underside of the top racks.
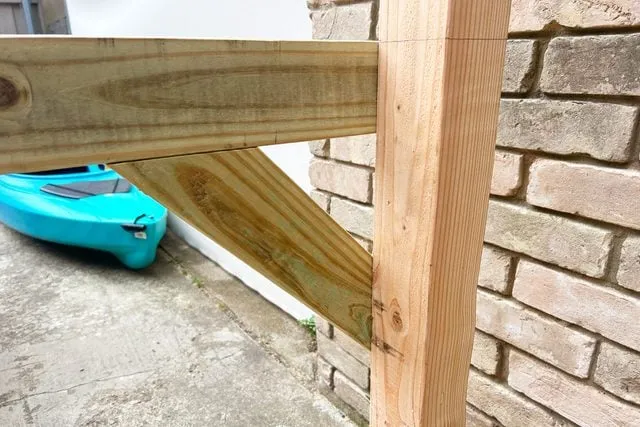 Add Cross Braces
Caption: Cross braces are essential for stability.
 Add Cross Braces
Caption: Attach your braces securely for a rock-solid rack.
Step 6: Pad the Racks and Store Your Kayaks
- Prepare the Padding: Cut your chosen padding material (yoga mat, pool noodle, etc.) into four pieces that will fit comfortably on the top racks.
- Attach the Padding: Apply wood glue to the top racks and carefully press the padding into place. Avoid using staples, as these could scratch your kayak.
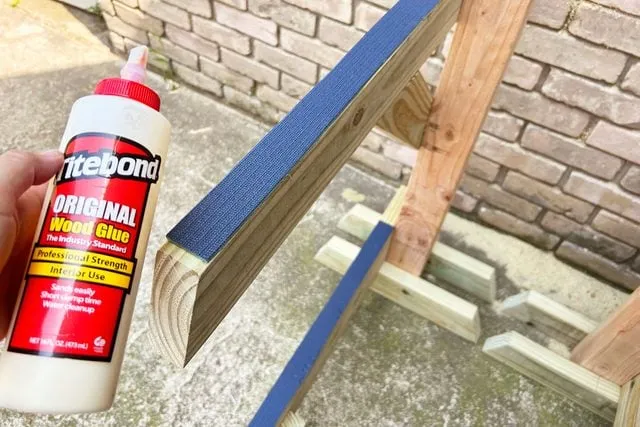 Kayak Rack Add Padding W Glue Diy Kayak Rack Ally Childress For Fhm Jvedit
Caption: Protect your kayak’s finish with padding.
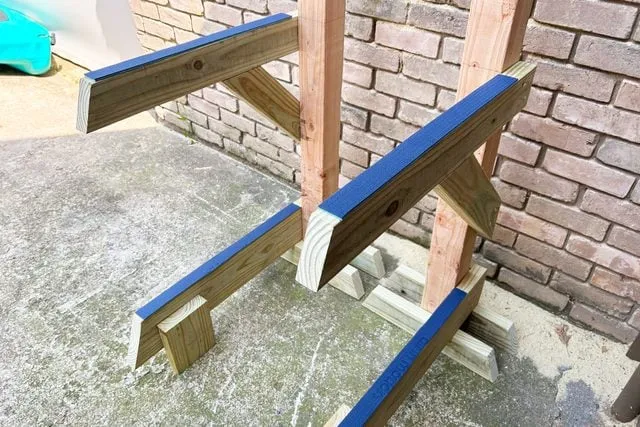 Kayak Rack Add Padding Diy Kayak Rack Ally Childress For Fhm Jvedit
Caption: Padding prevents scratches and dings.
- Store Your Kayaks: Position your newly built kayak rack in your chosen location. For optimal storage and to prevent water from collecting inside, store your kayaks deck-side down.
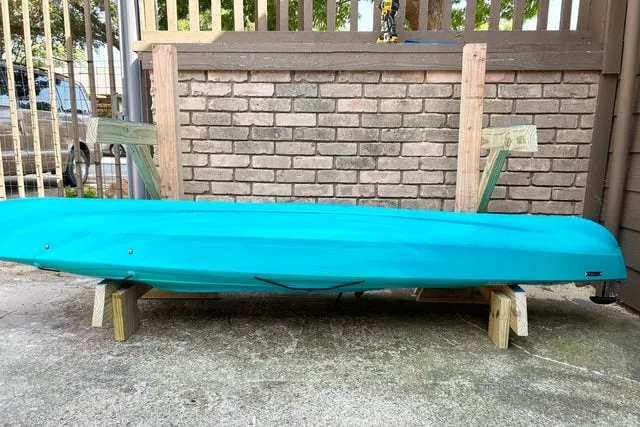 DIY Kayak Rack
Caption: Admire your handiwork! Your kayaks are now safely stored.
Conclusion: Your DIY Kayak Rack Triumph
Congratulations! You’ve successfully built a robust and functional DIY kayak rack. No more storage headaches— your kayaks are safe, secure, and out of the way. This project is a perfect example of how a bit of DIY spirit can save you money and enhance your enjoyment of your favorite hobbies.
I encourage you to give this project a try and experience the satisfaction of building something with your own two hands. And remember, the world of crafting is full of possibilities! Explore Robert Kline Art for more inspiring DIY ideas, tips, and tricks to fuel your creative fire. Happy crafting!
