Blog
DIY Fold-Down Desk: Save Space & Conquer Your Craft Room
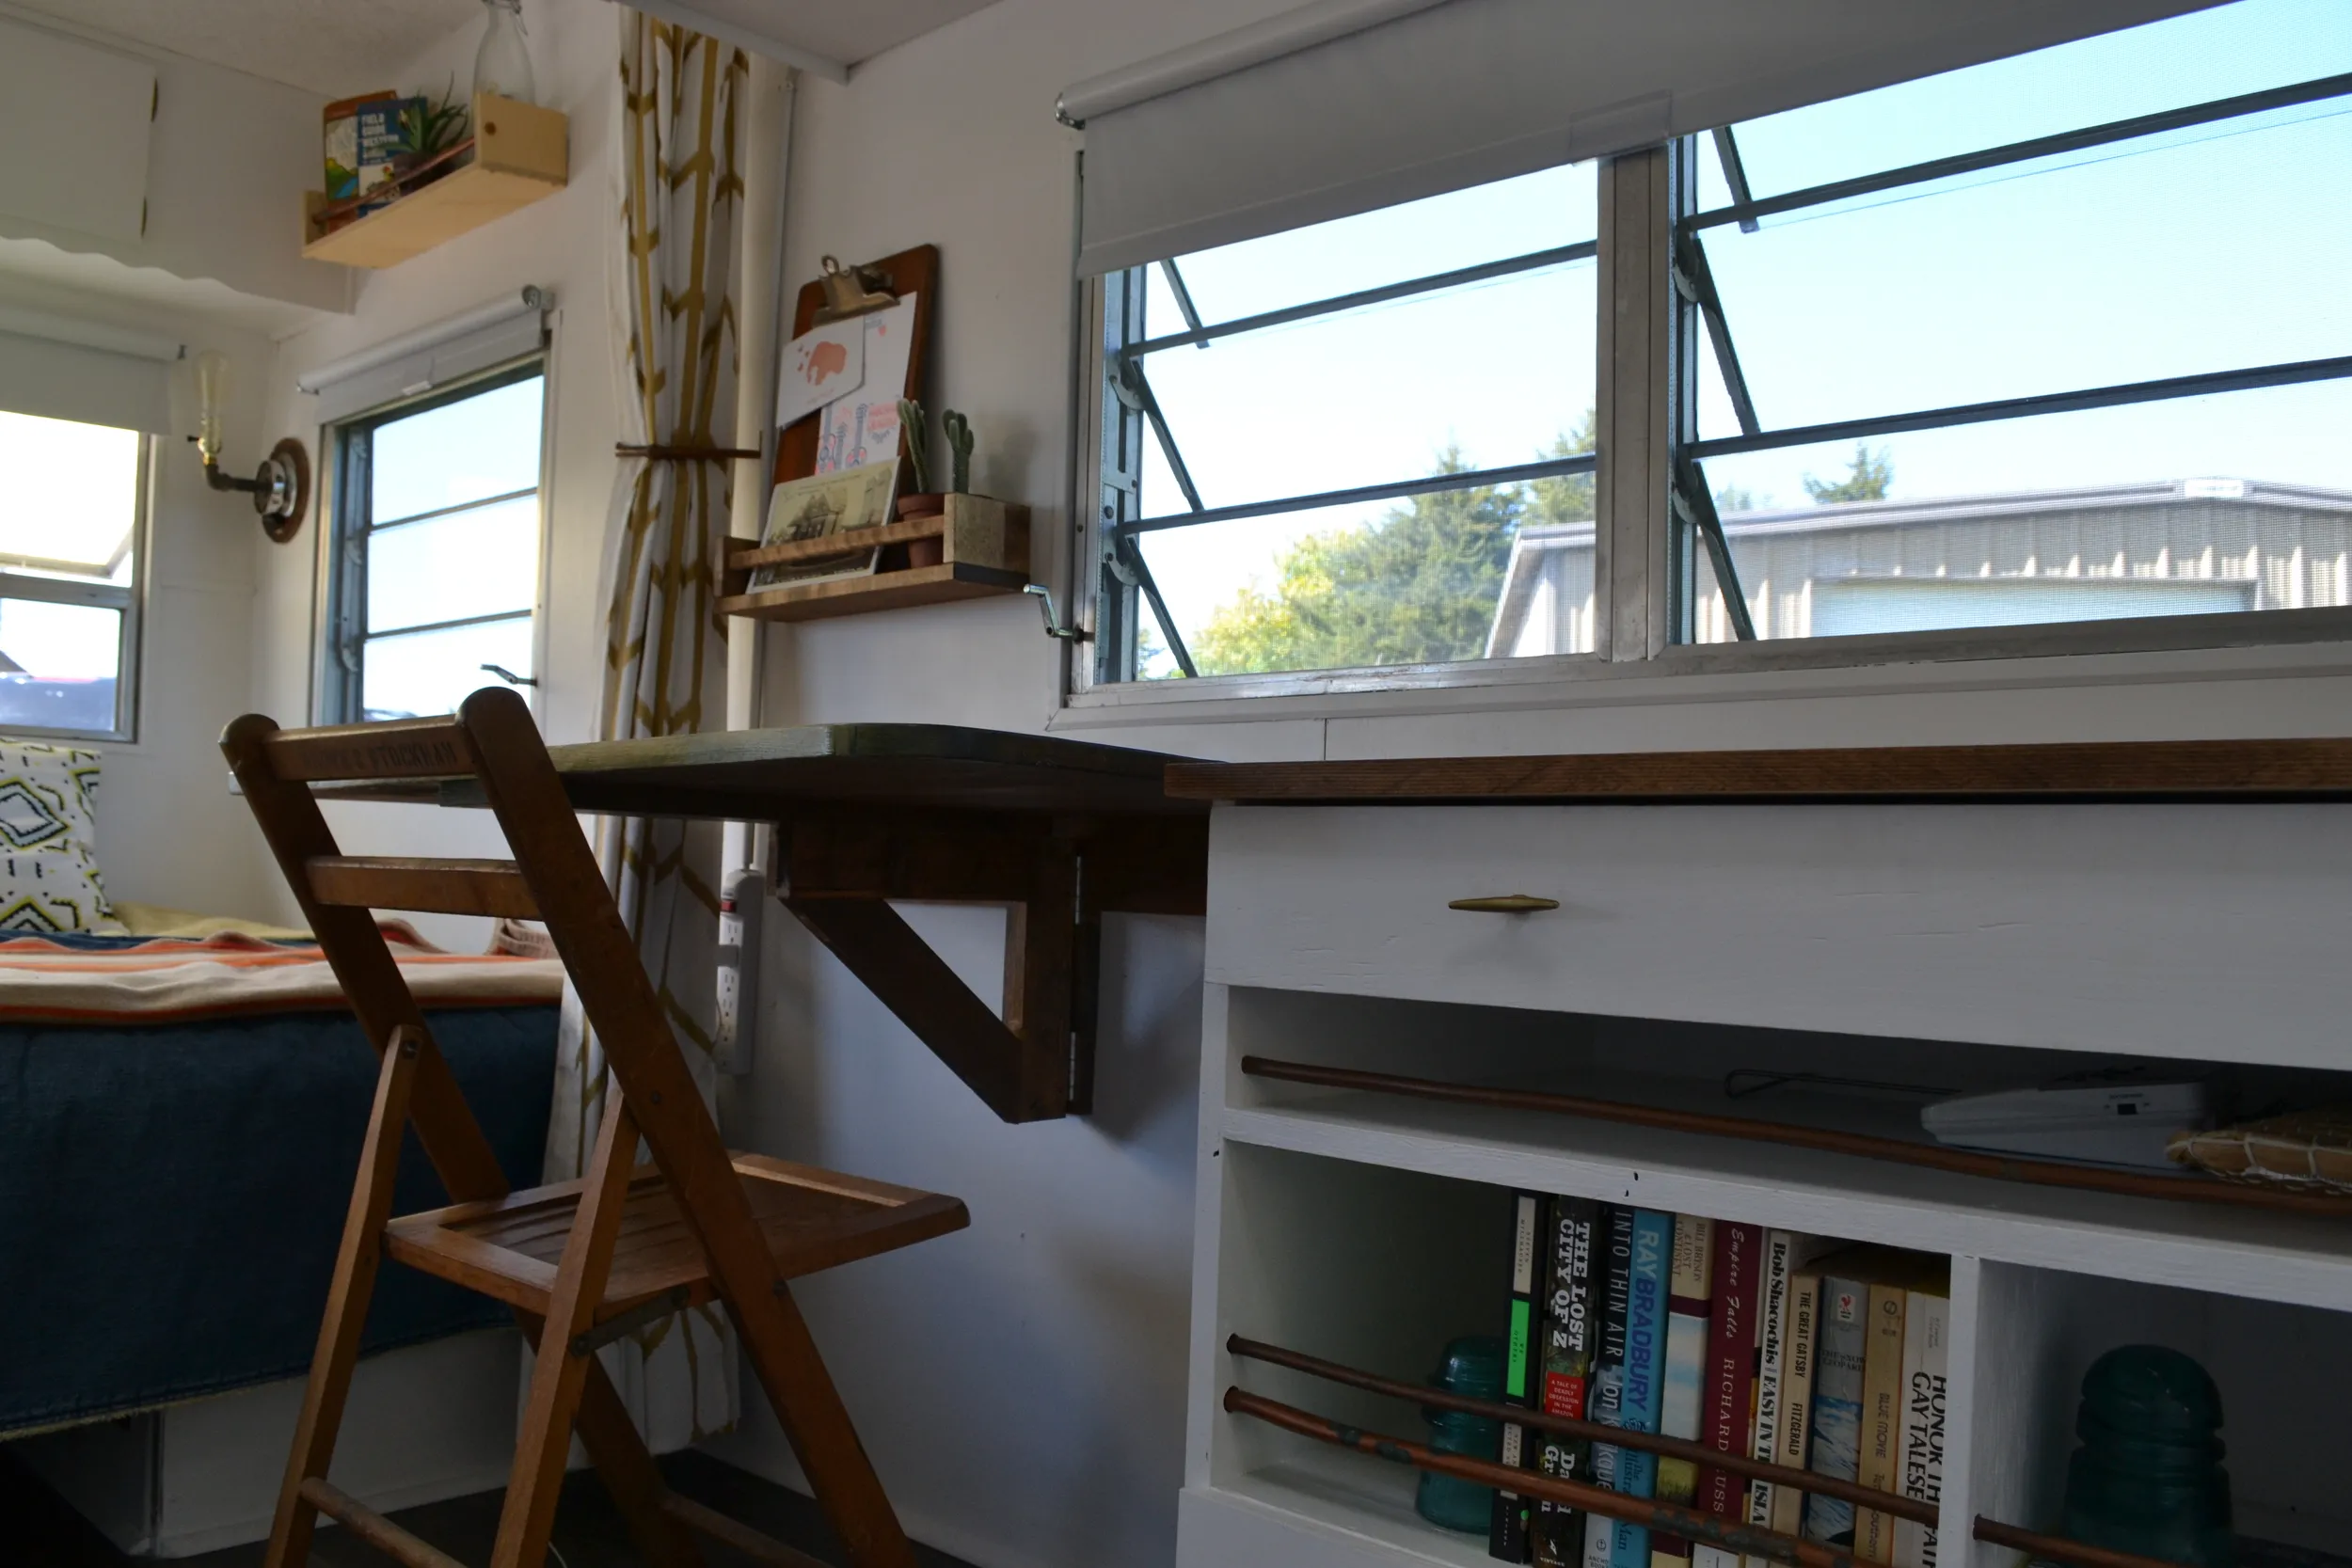
Hey there, fellow craft enthusiasts! Robert Kline, your friendly neighborhood art aficionado, here. Ever felt like your creative space was shrinking faster than your yarn stash after a crocheting spree? We’ve all been there. That’s why today, I’m sharing a game-changing DIY project: a custom wall-mounted, drop-leaf table, perfect for maximizing space without sacrificing functionality.
The IKEA Inspiration (But Way Cooler)
 The folding desk is a huge space saver in the camper. Sure, we could have bought one at IKEA. But then it wouldn't really be ours.
Now, I love a good IKEA hack as much as the next DIYer. But sometimes, you crave that unique, personal touch. Let’s be honest, building it yourself comes with bragging rights! Plus, you can customize the size, finish, and style to perfectly match your artistic vision.
Gathering Your Tools and Materials
Before we dive in, let’s round up our crafting arsenal. You’ll need:
- Wood: Pine board for the top, scrap wood for braces (or purchase pre-cut pieces)
- Hinges: Two – one for the up/down motion and one for the folding brace
- Screws: Various sizes
- L-Bracket: For extra support
- Wood Glue: Because a little extra bonding never hurt
- Wood Peg: The secret to a secure folding mechanism
- Sandpaper: For a smooth, splinter-free finish
- Stain or Paint: Let your personality shine through!
- Polyurethane: Protects your masterpiece
- Tools: Drill, saw (jigsaw is ideal for rounded corners), measuring tape, level, pencil
Let’s Get Building: A Step-by-Step Guide
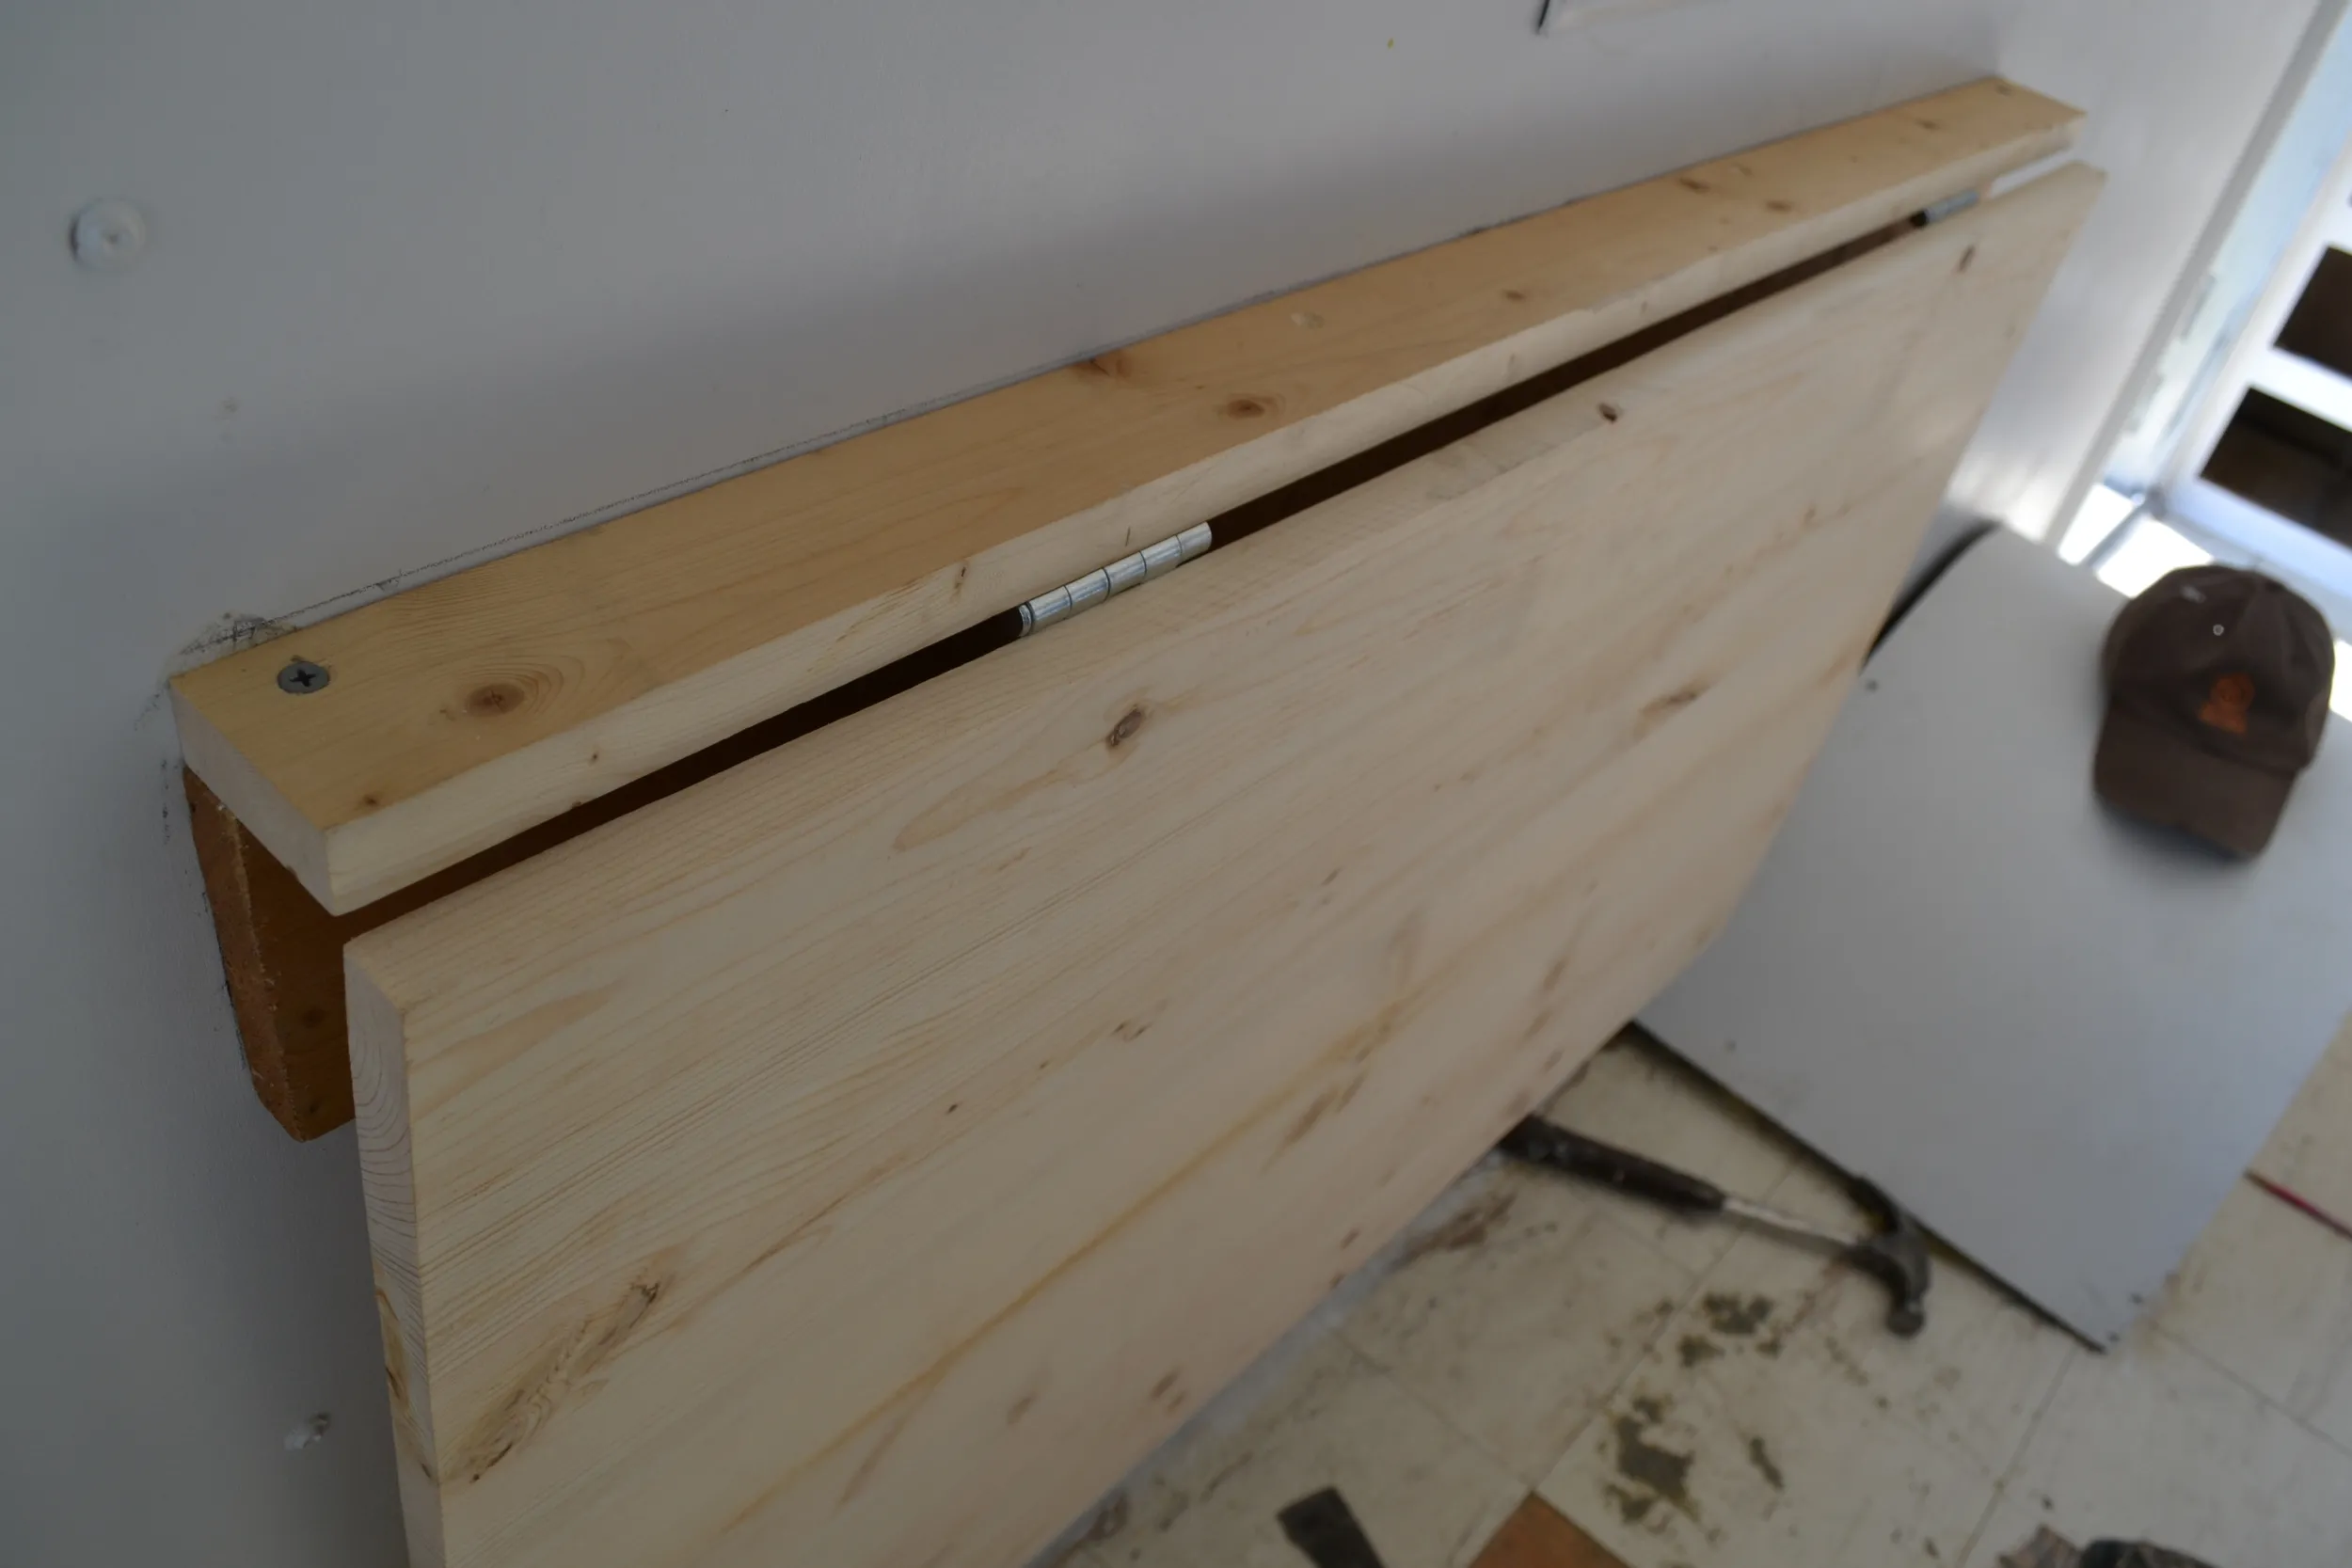 Here's what you're working toward. It looks a lot like the IKEA version, if you ask us. Take note: see that pencil line? We drew that once we found the stud in the wall and it was our measure of how high we wanted the desk to be. Just read below, it…
1. Planning Makes Perfect:
- Inspiration is key! Snap photos and even videos of similar folding desks (IKEA is a good starting point). Visuals are crucial, especially if you have a partner-in-crime who hasn’t stepped foot in IKEA for a while (you know who you are, Jerry!).
- Sketch it out: A simple drawing goes a long way in clarifying the design and how the pieces will work together. Trust me, it prevents headaches later!
2. Finding Your Support System:
- Locate a stud: This is essential for a sturdy desk. Use a stud finder or the good old-fashioned “knock-on-the-wall” method.
- Determine your ideal height: Remember, comfort is key! 32-34 inches is a standard desk height.
3. Building the Foundation:
- Horizontal Brace: This workhorse takes the brunt of the weight, so make sure it’s securely attached to the stud.
- The Lip: This small but mighty piece creates a flush surface when the desk is folded up.
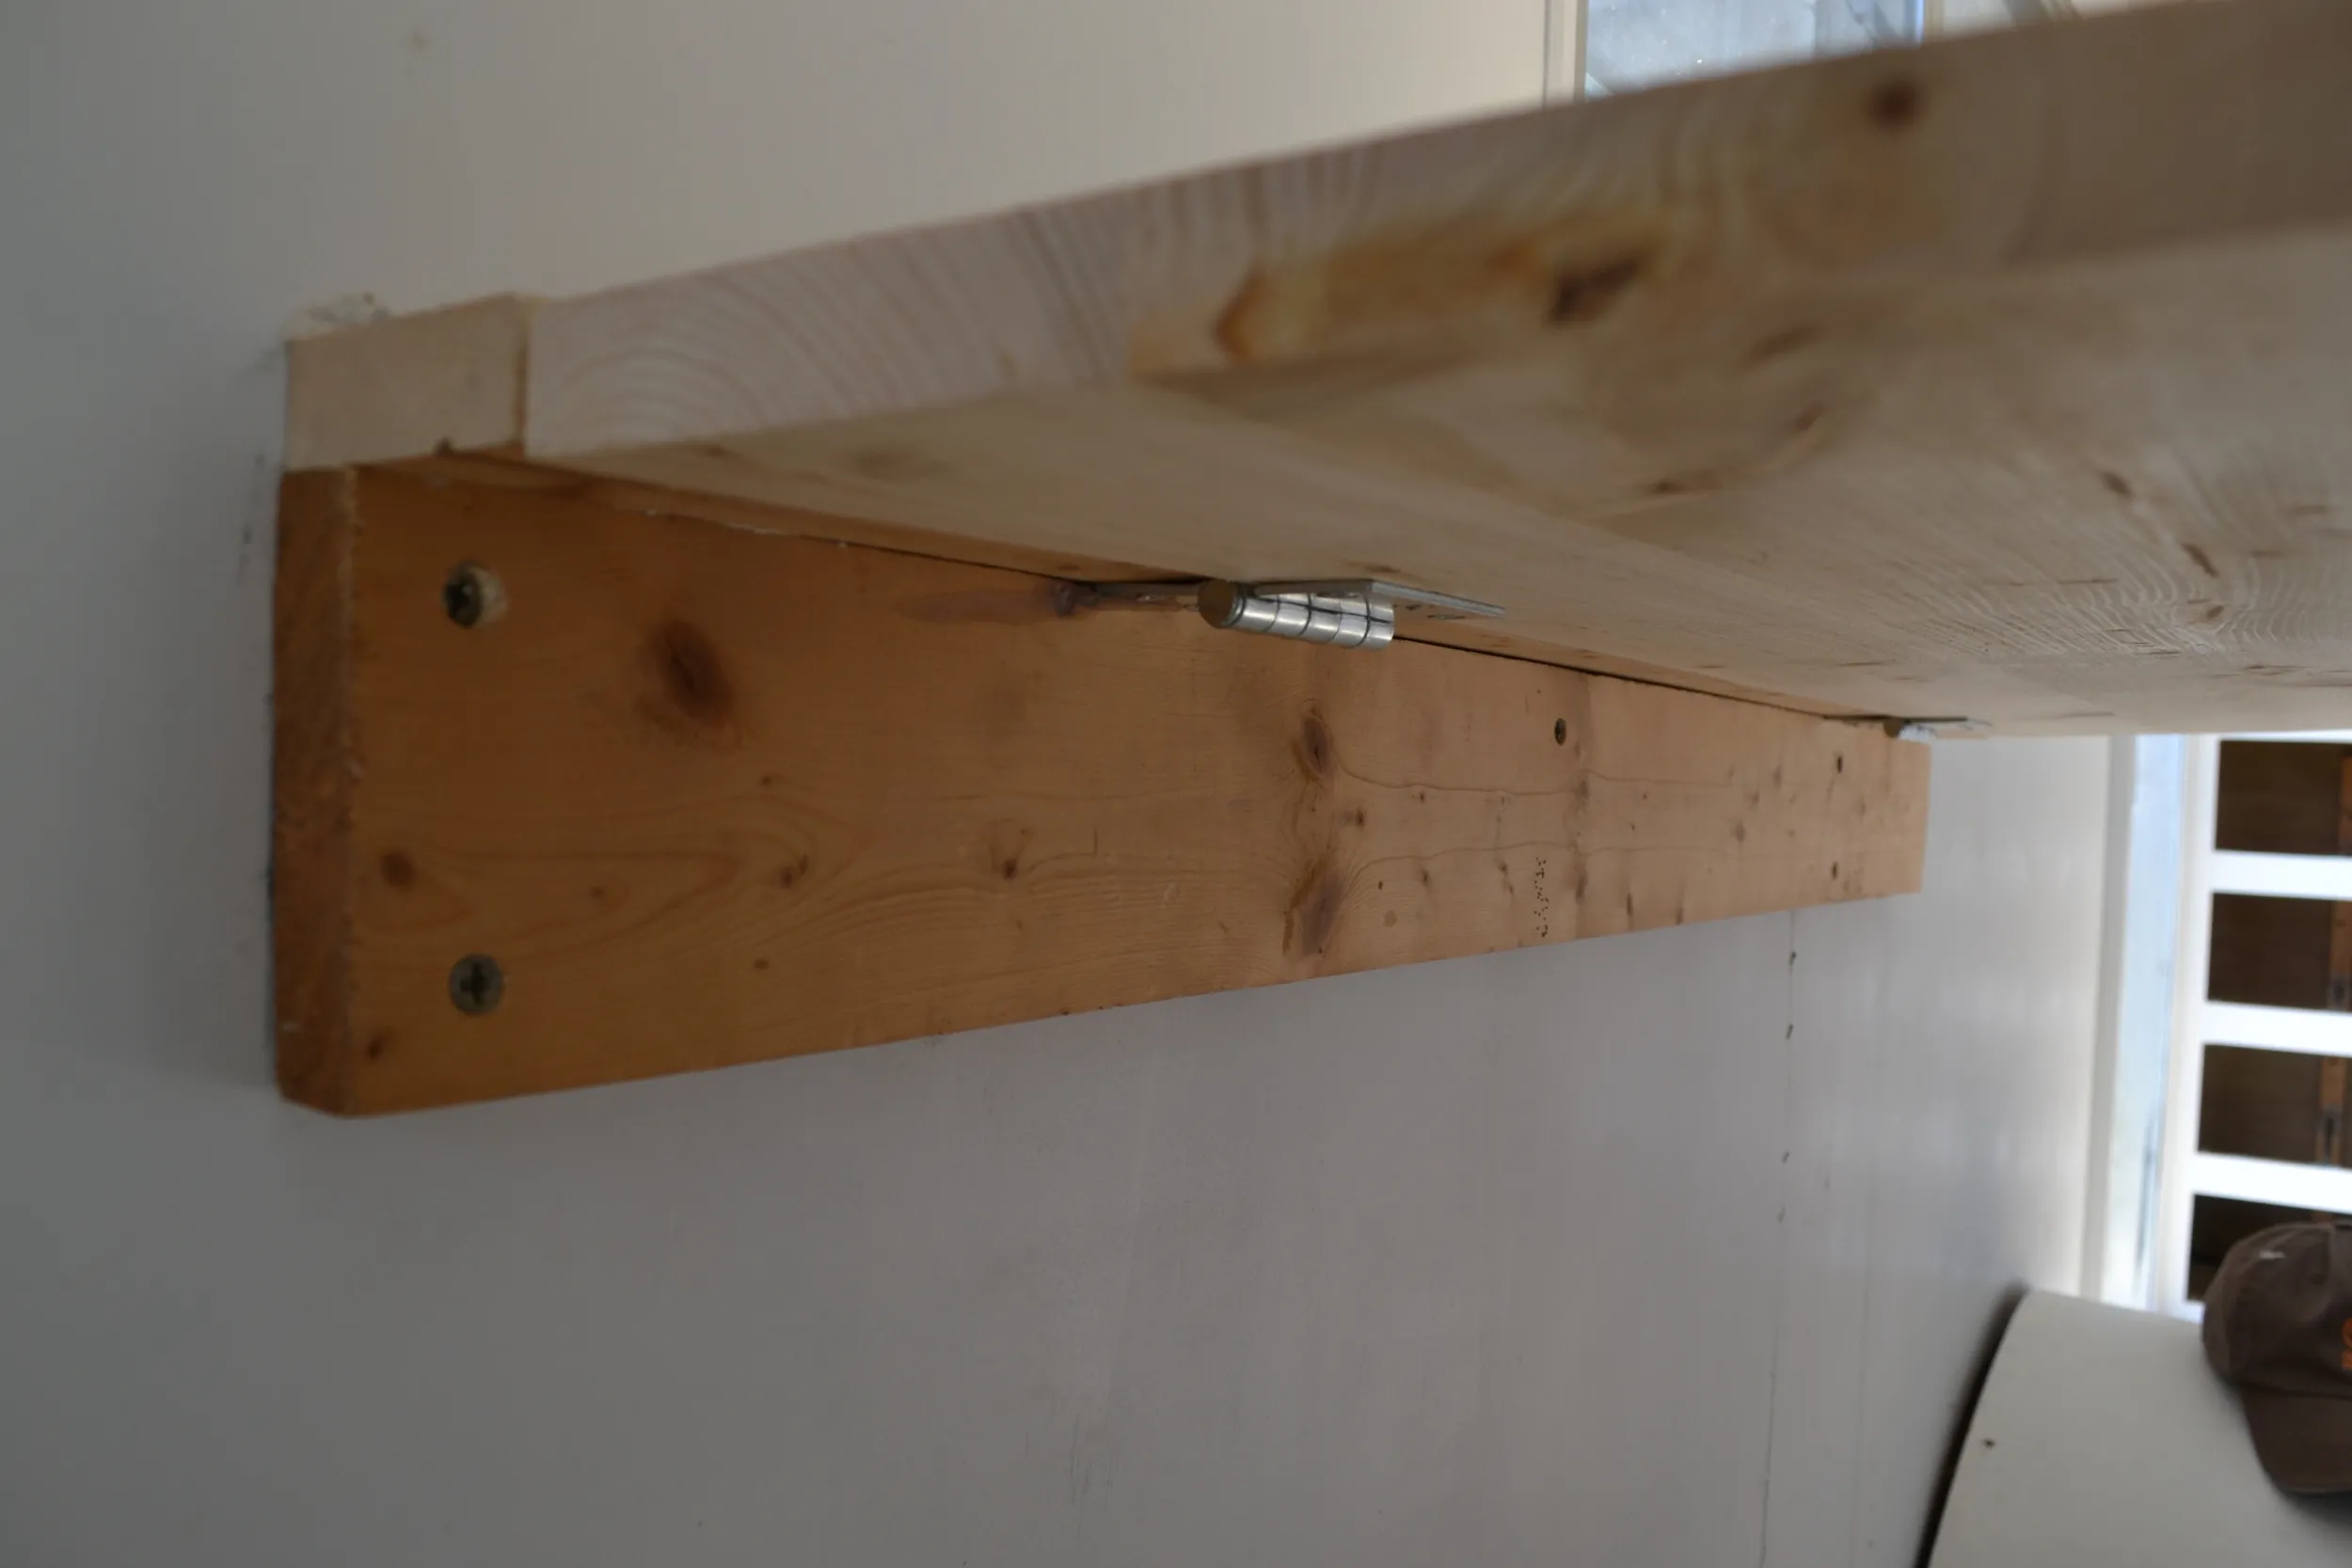 Here's the important stuff: a) the horizontal brace is the one drilled into the wall. The lip is the board sitting on top of it. The top is the big piece hinged to the lip. Got it?
4. Adding the Top and Hinges:
- Attach your hinges to the lip and the underside of your desktop.
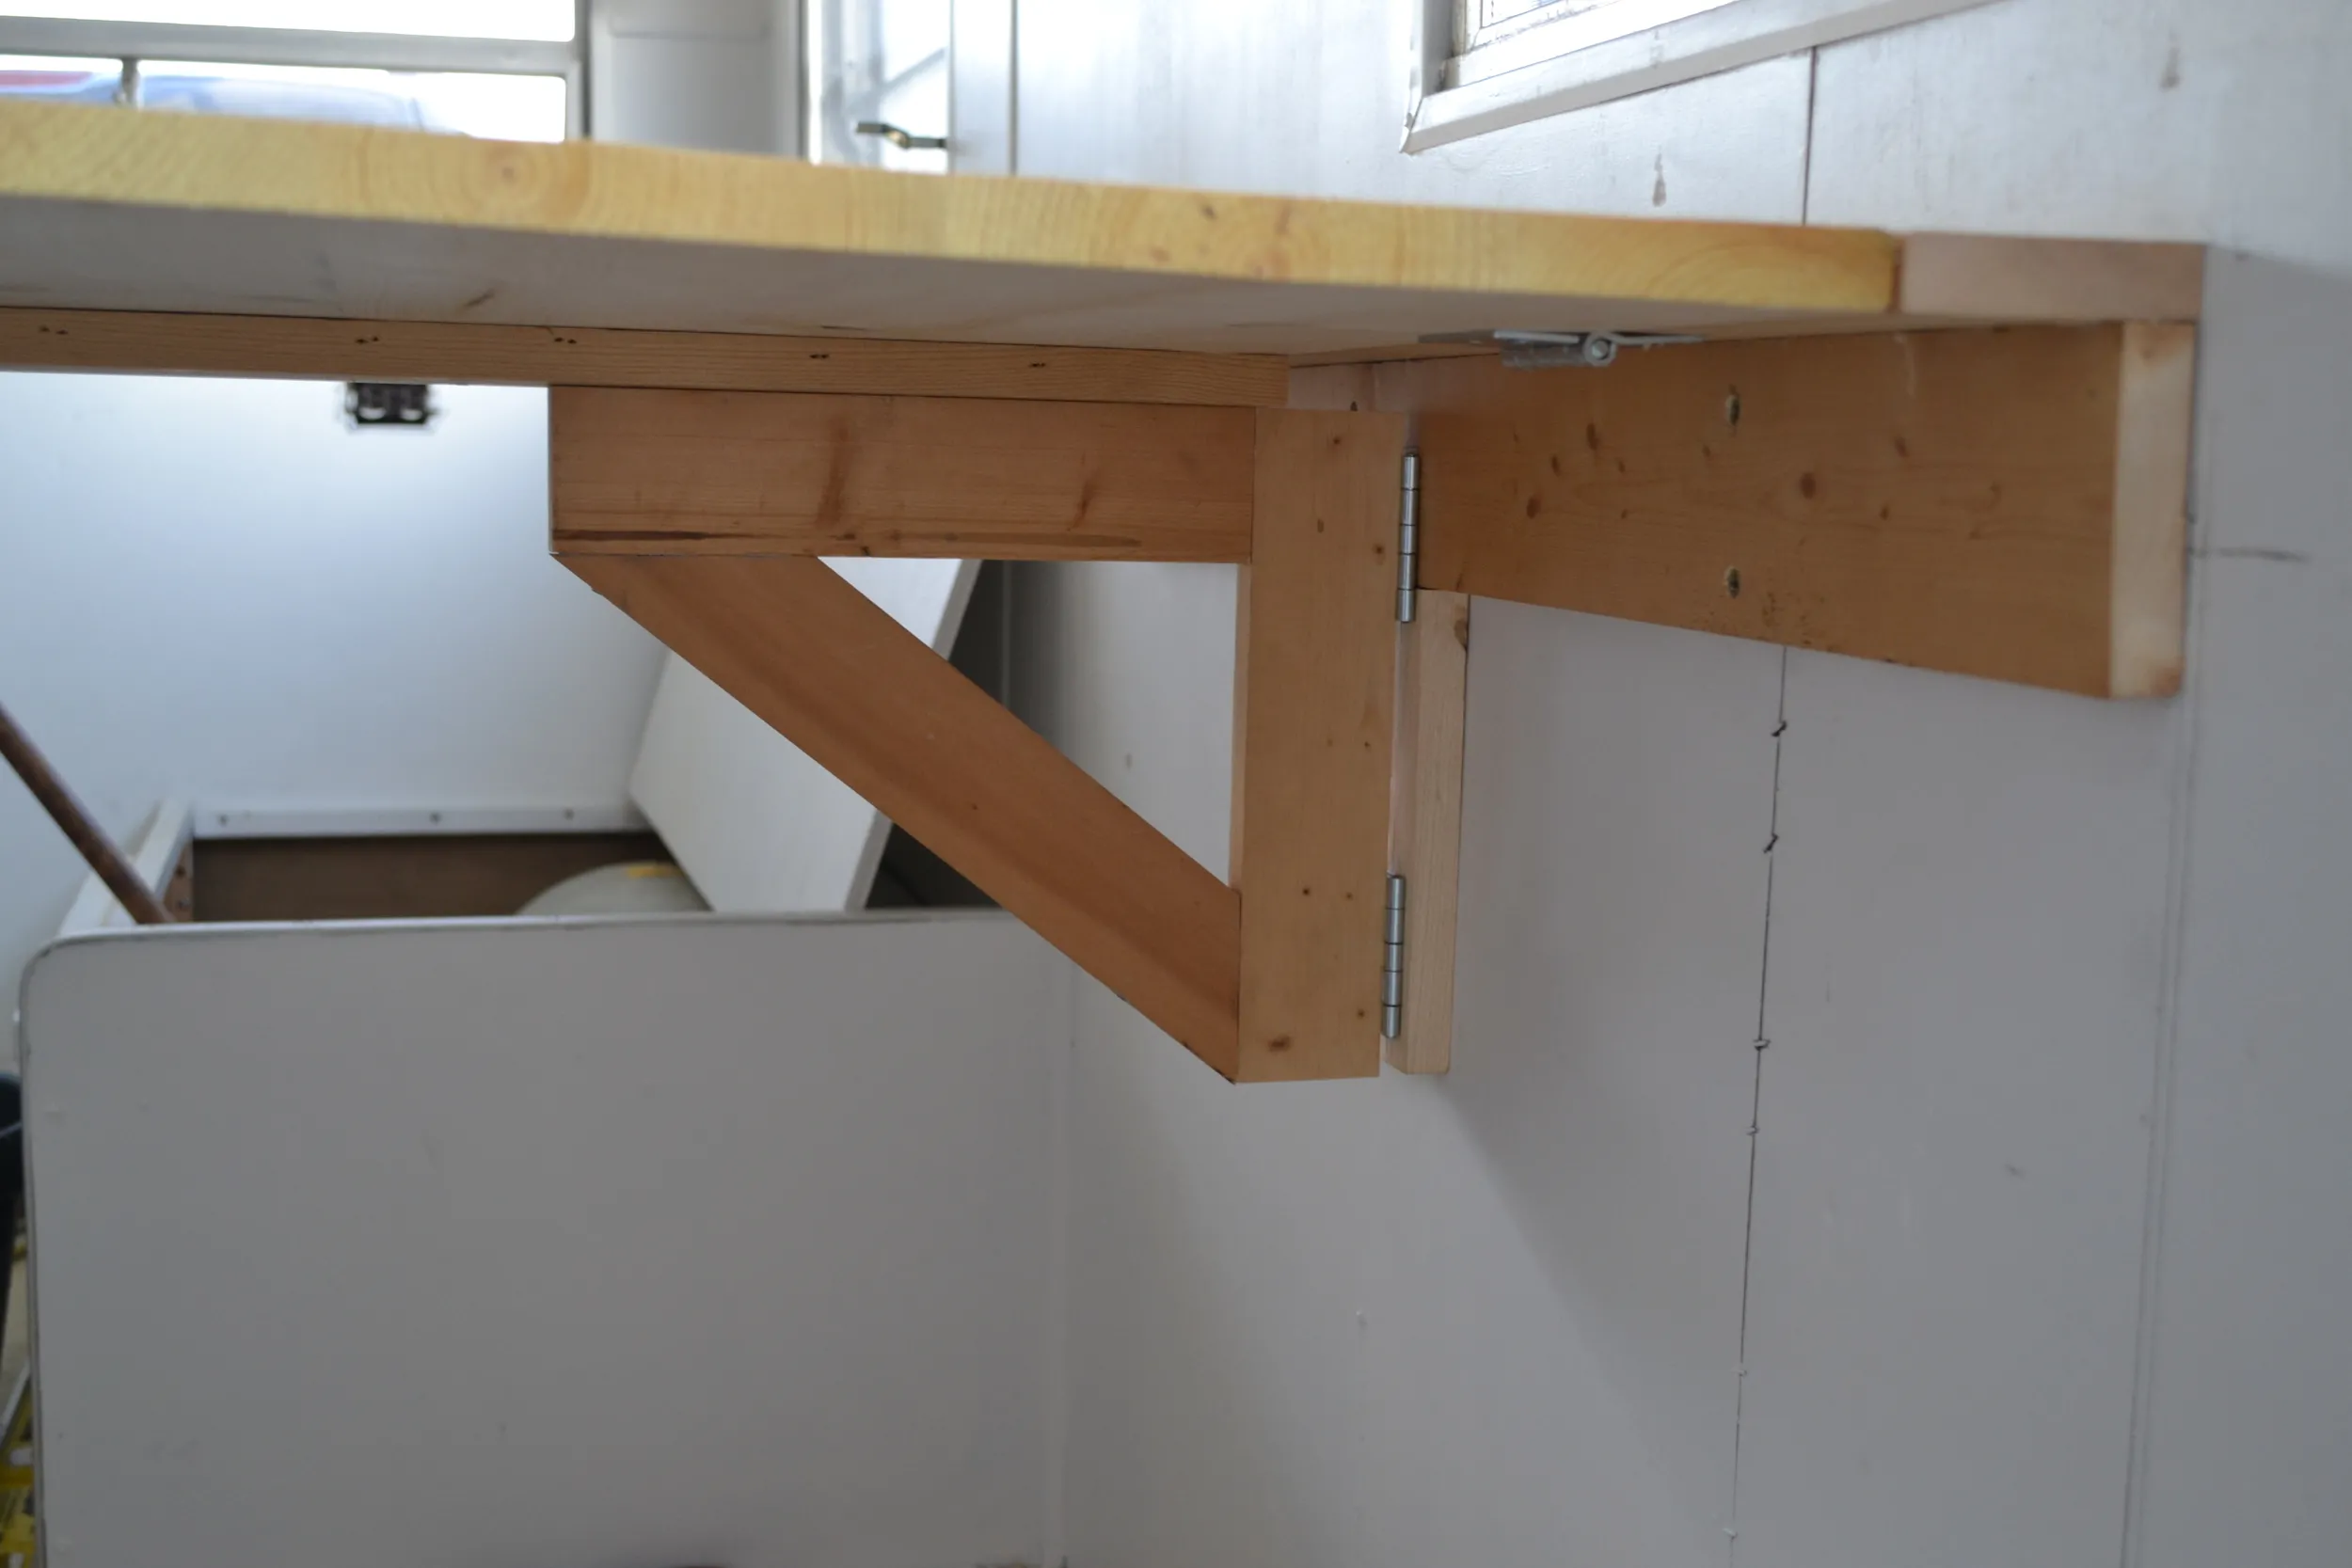
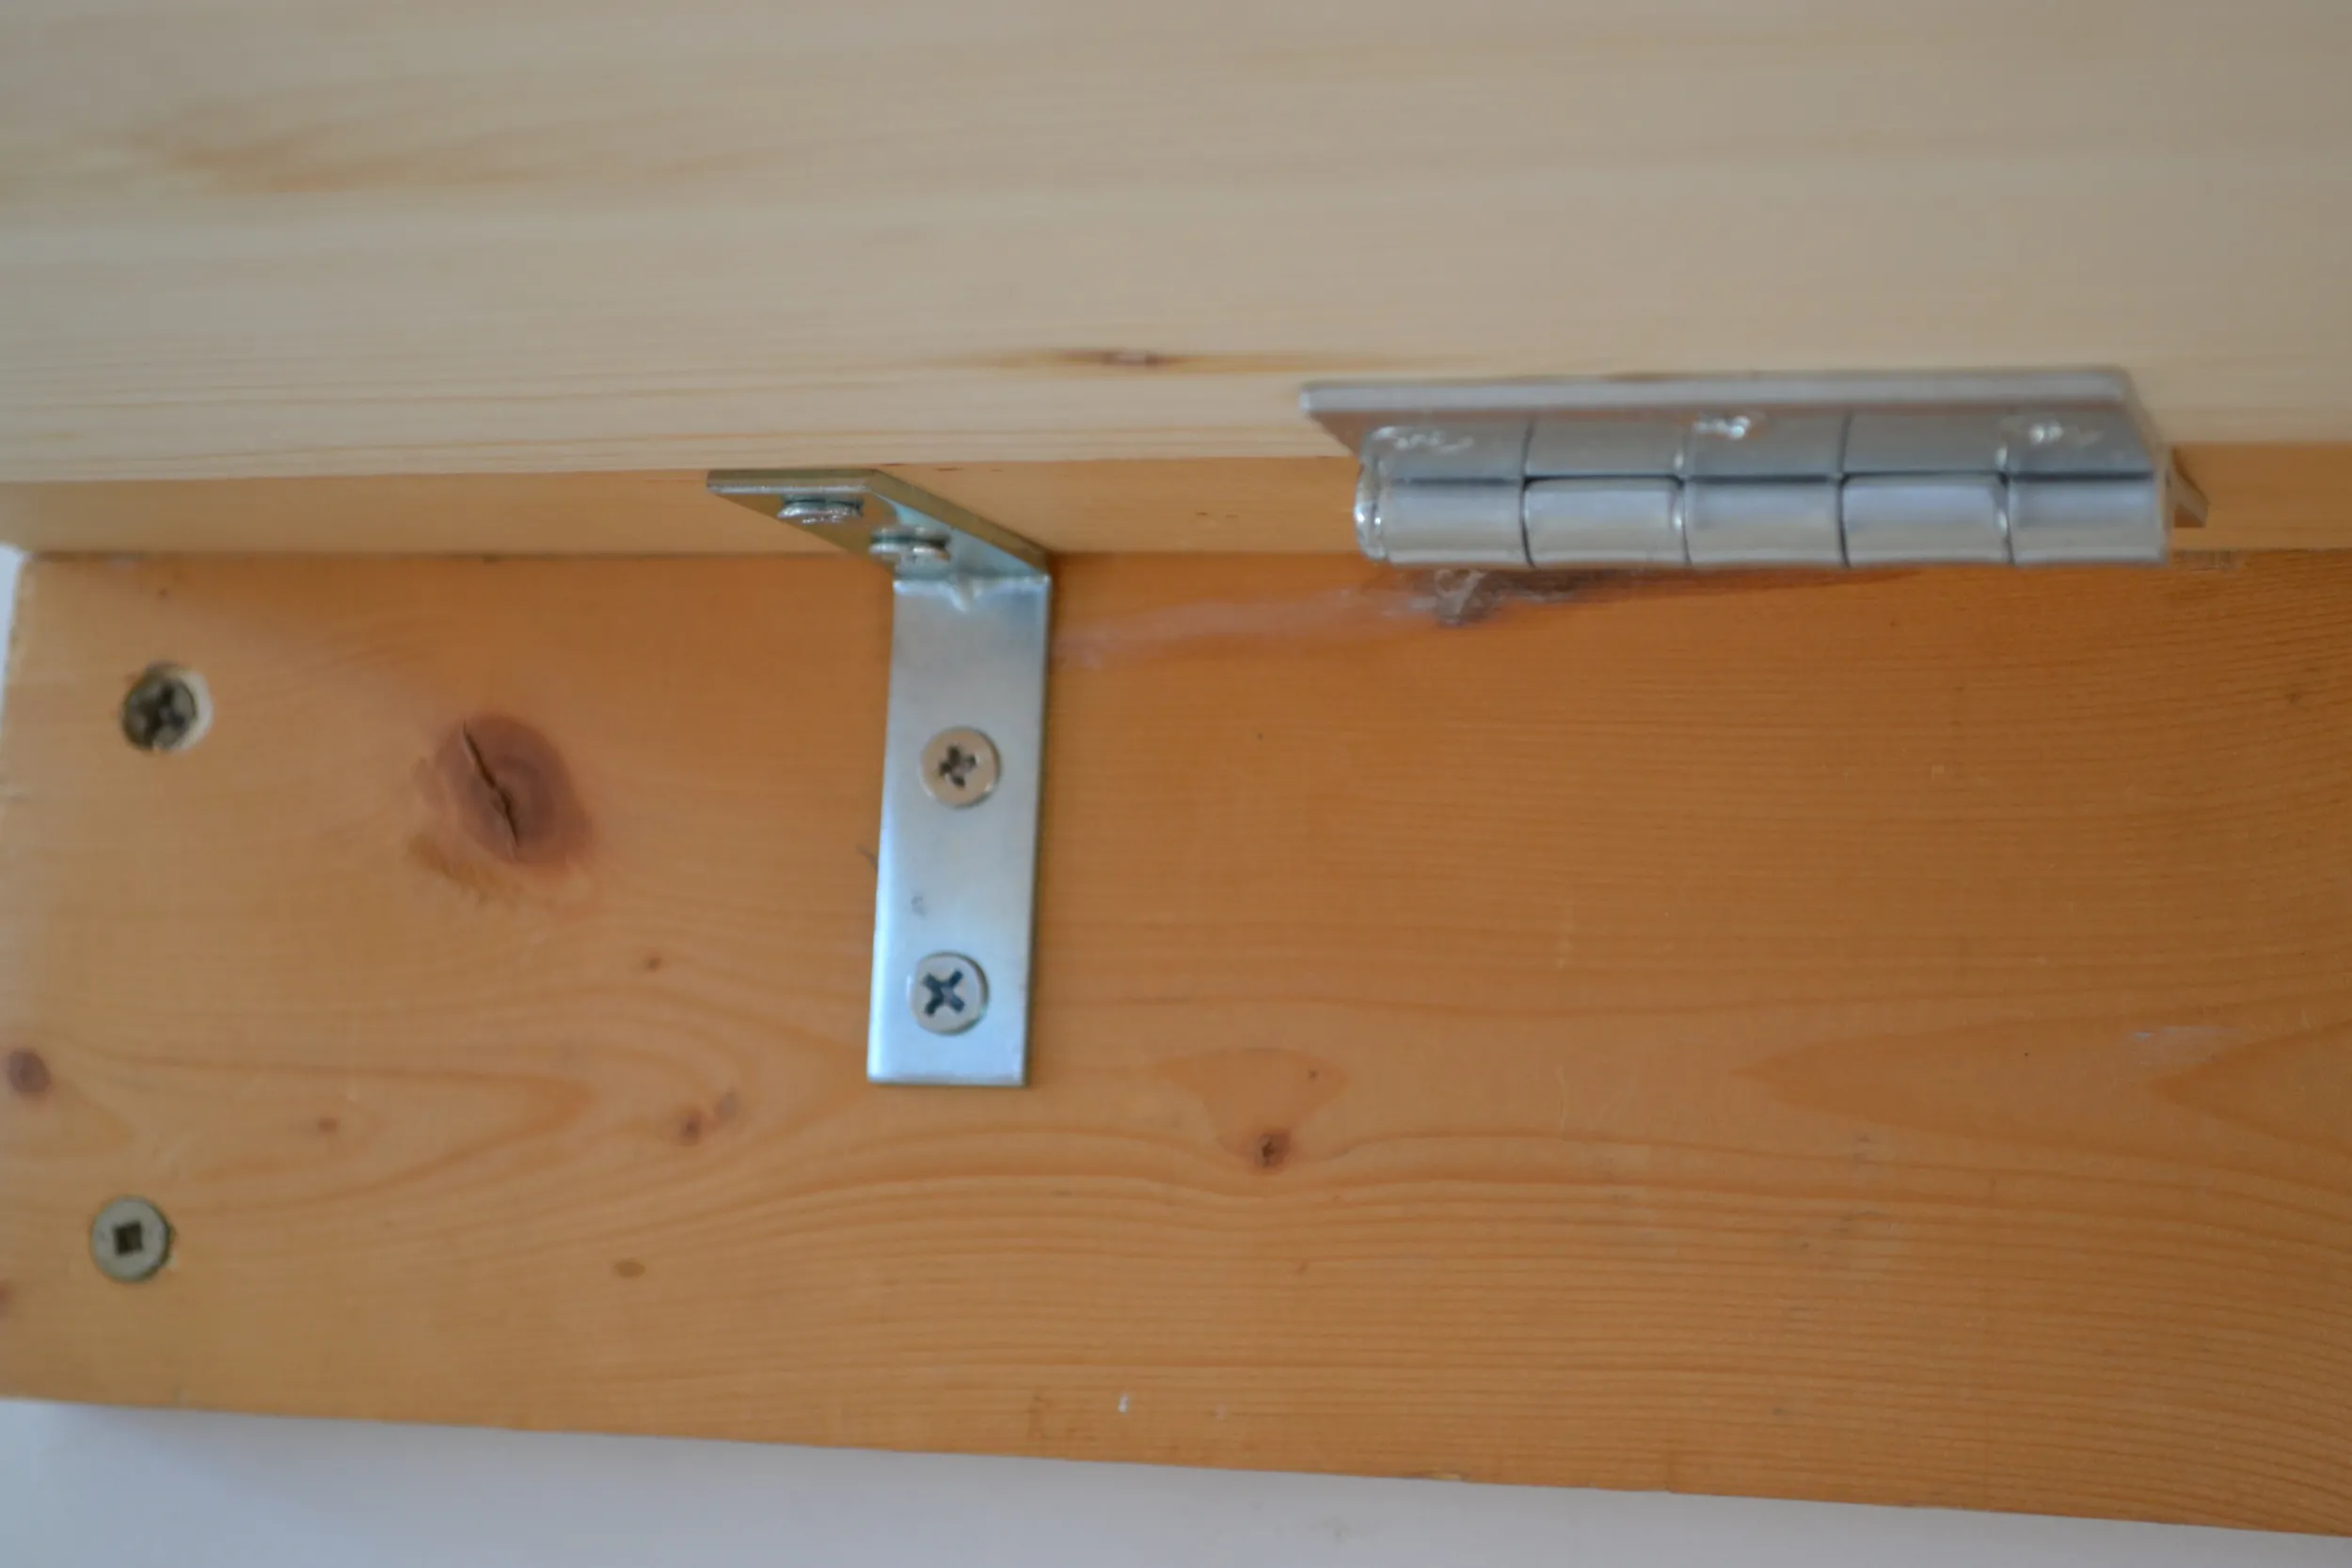 Here you can clearly see the horizontal brace, the lip, the L bracket, and the up/down hinge.
5. Creating the Folding Mechanism:
- The “T”: Attach a vertical brace to the wall. This is what your folding brace will connect to.
- The Triangle Brace: Craft a sturdy triangle brace (three pieces of wood work best!) and attach it with hinges to the vertical brace and the underside of the desktop.
- The Wood Peg: This little guy is the unsung hero. Drill holes in the triangle brace and the underside of the desktop and secure it with the peg. This prevents the desk from wobbling when in use.
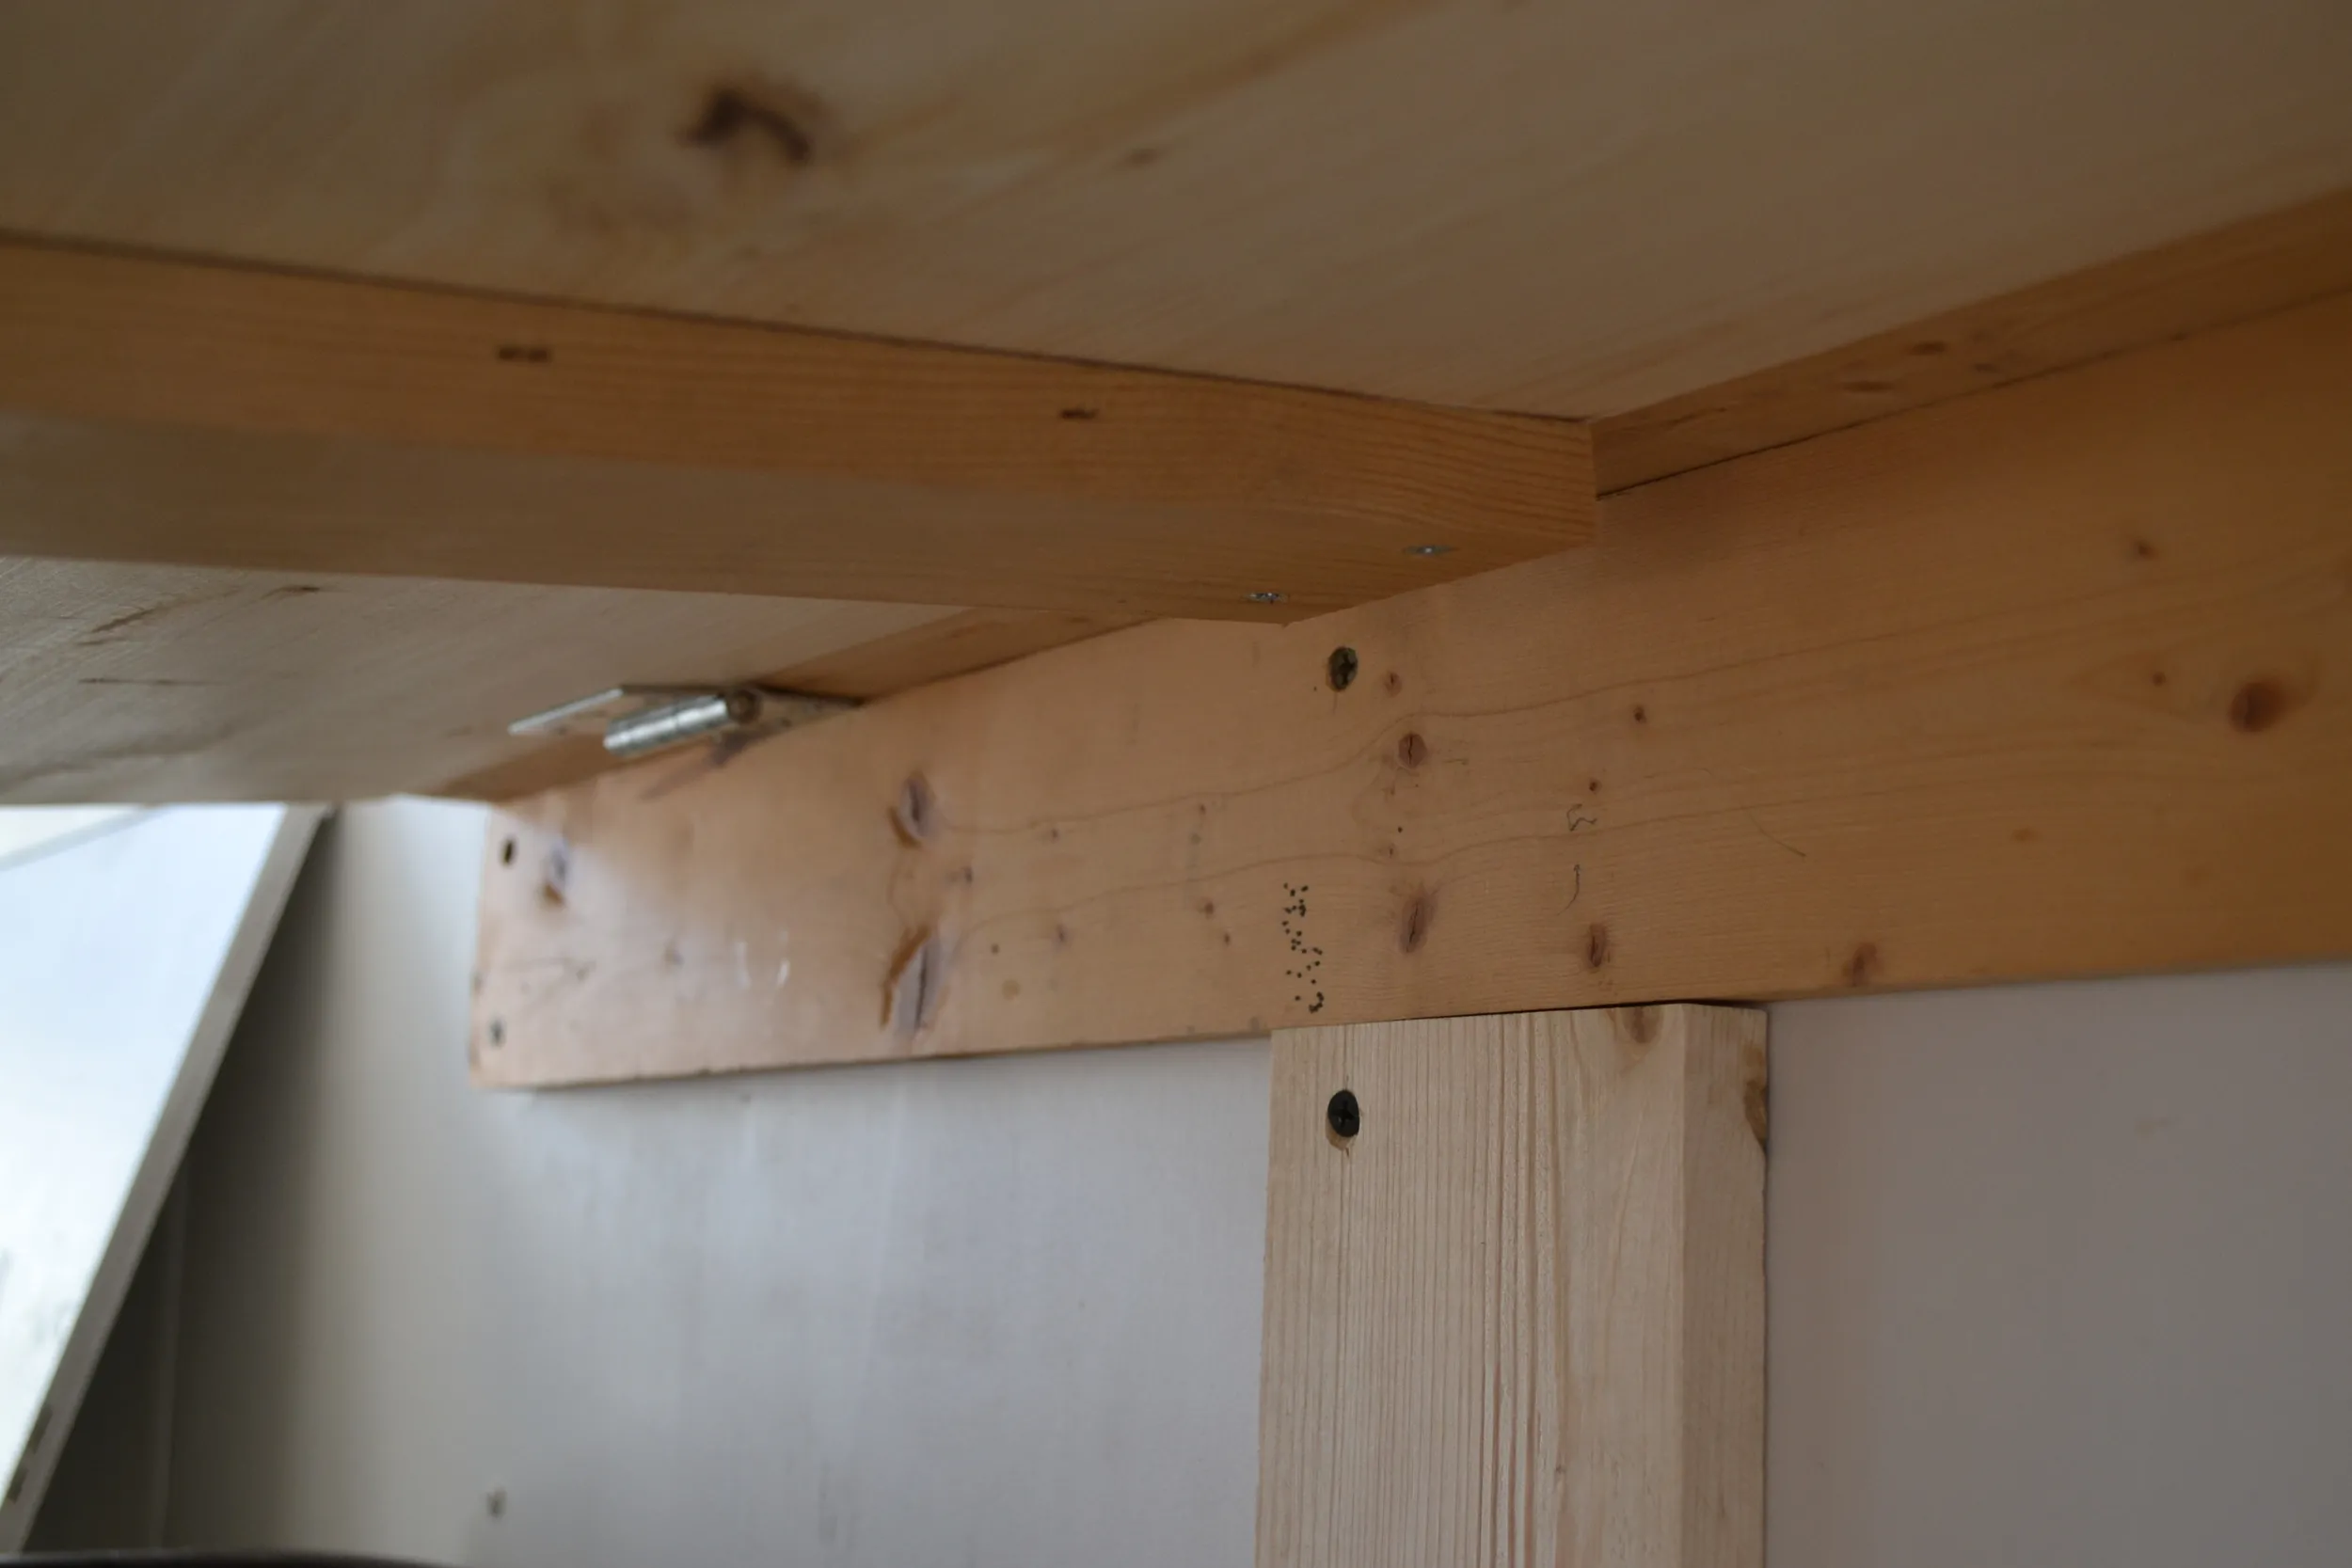 Here's your T. Also: see the brace board we applied the the underside of the top board.
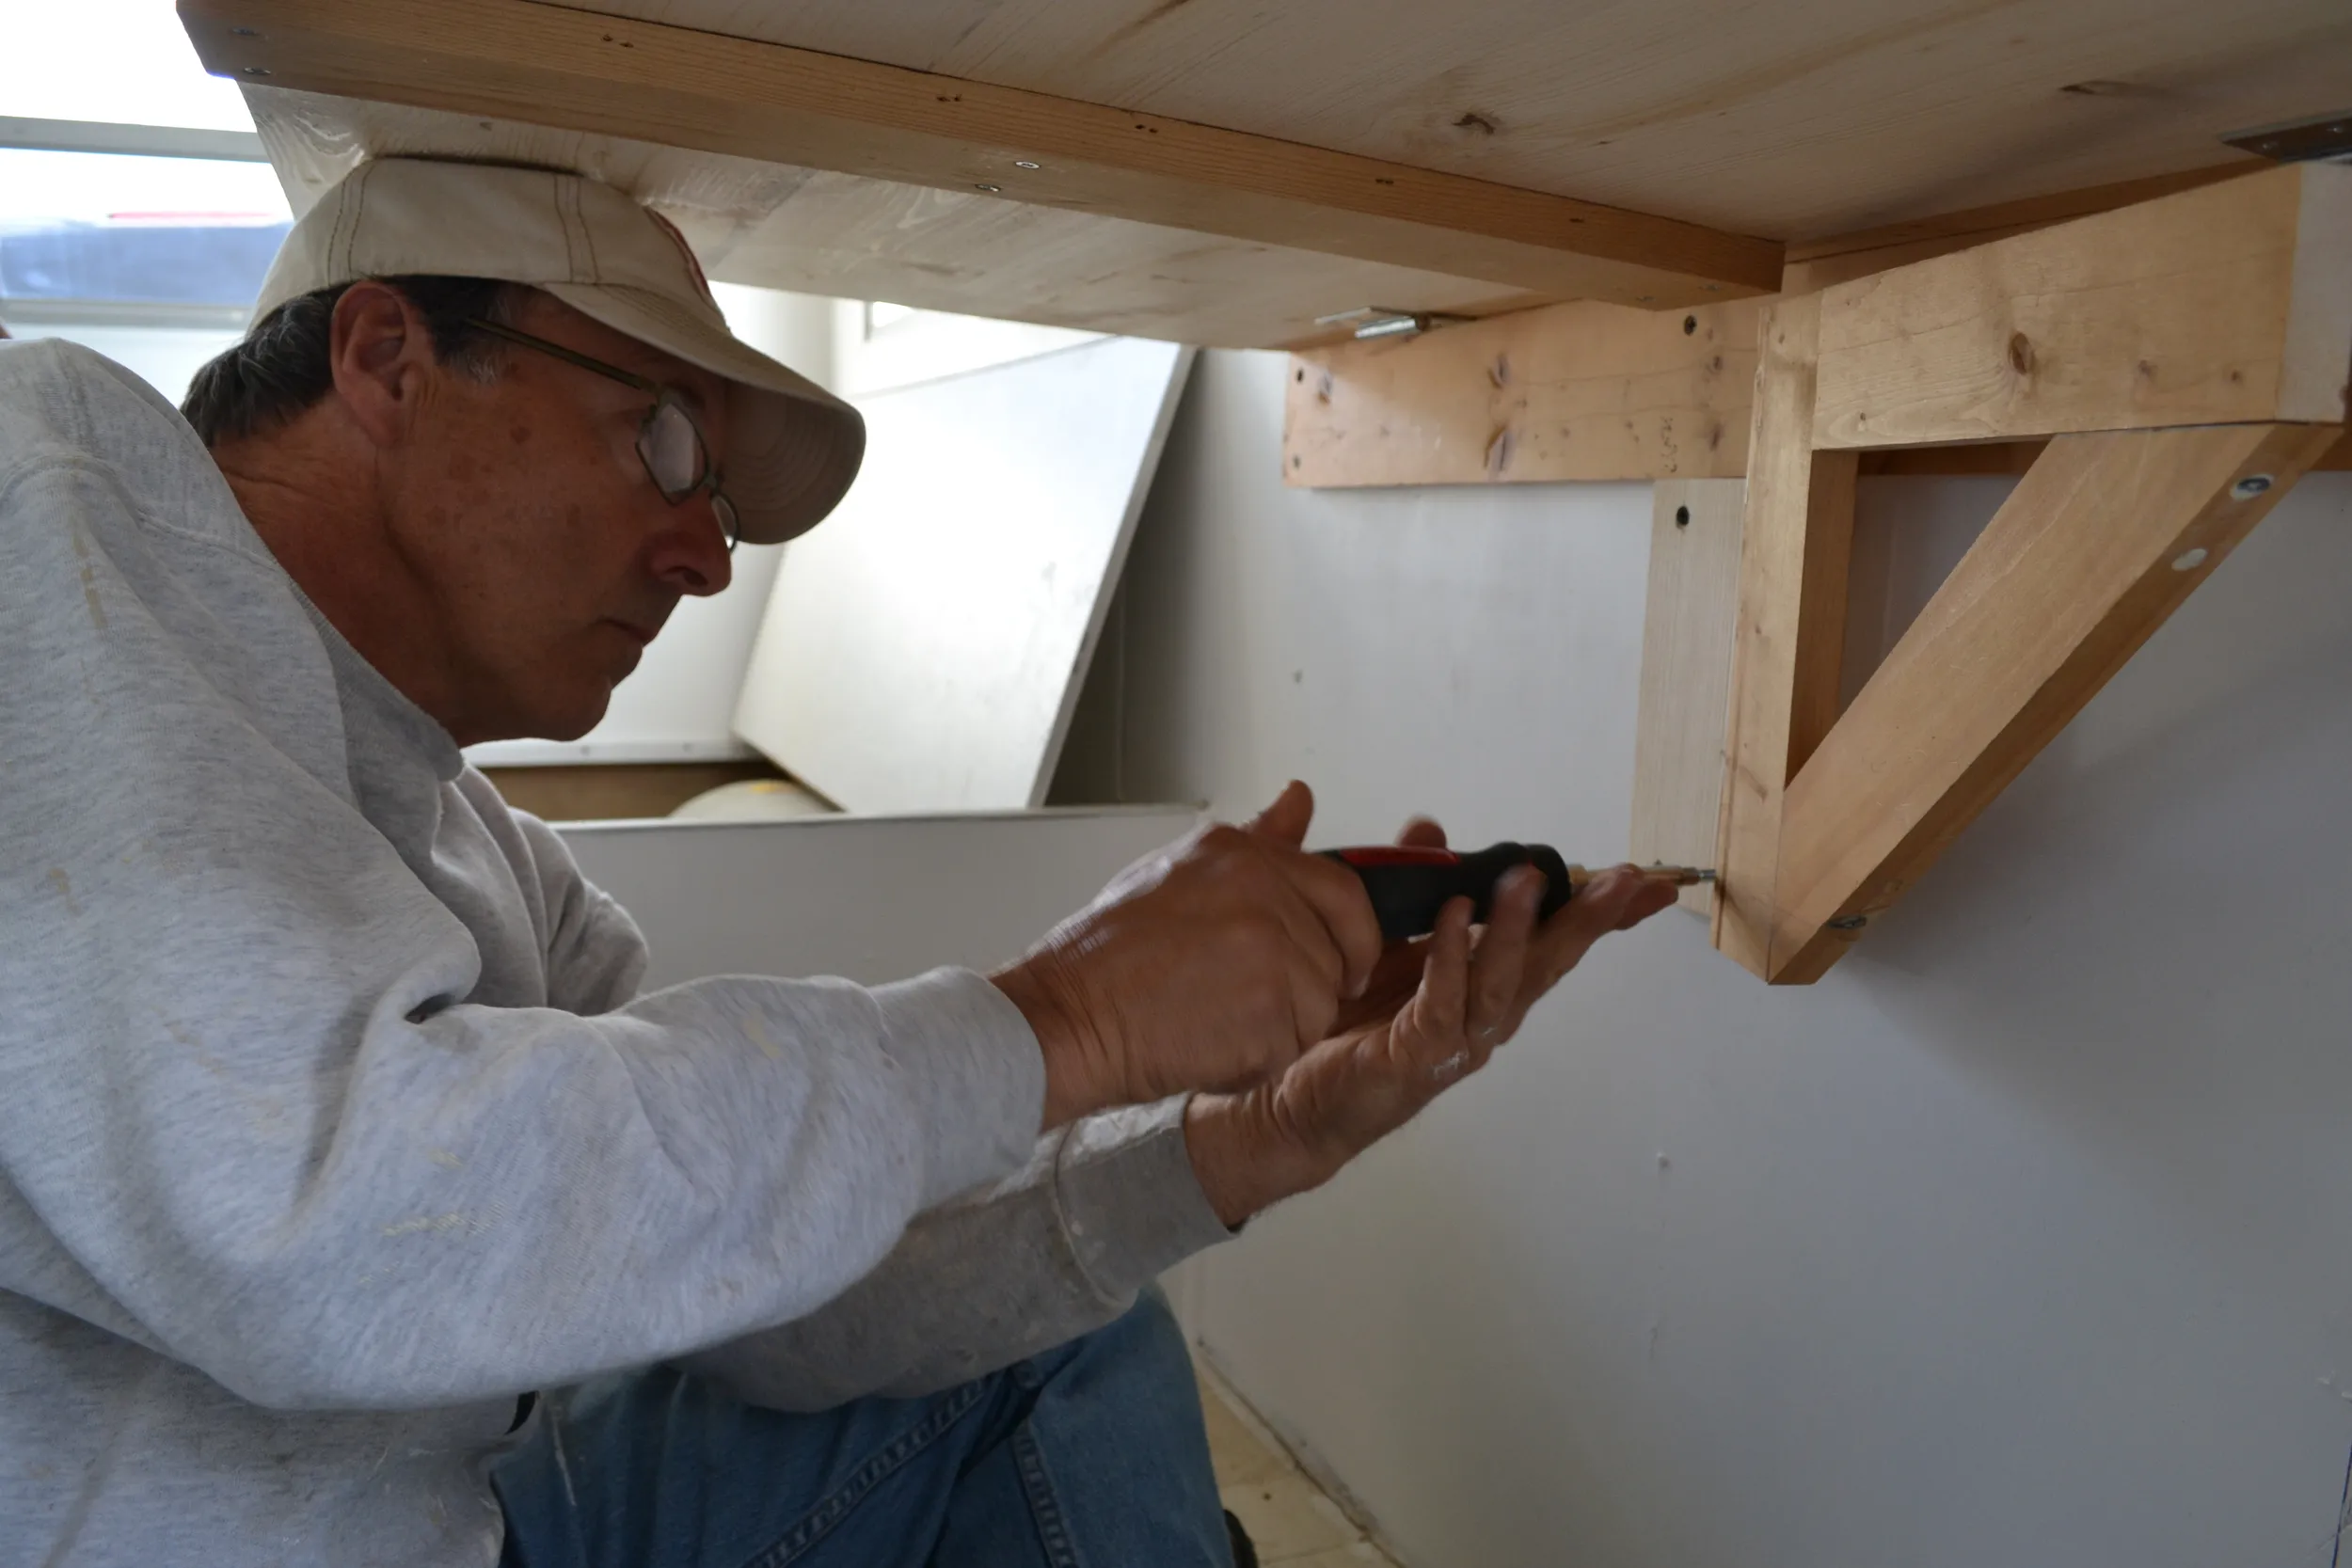 Jerry screws the triangle brace into the T. 
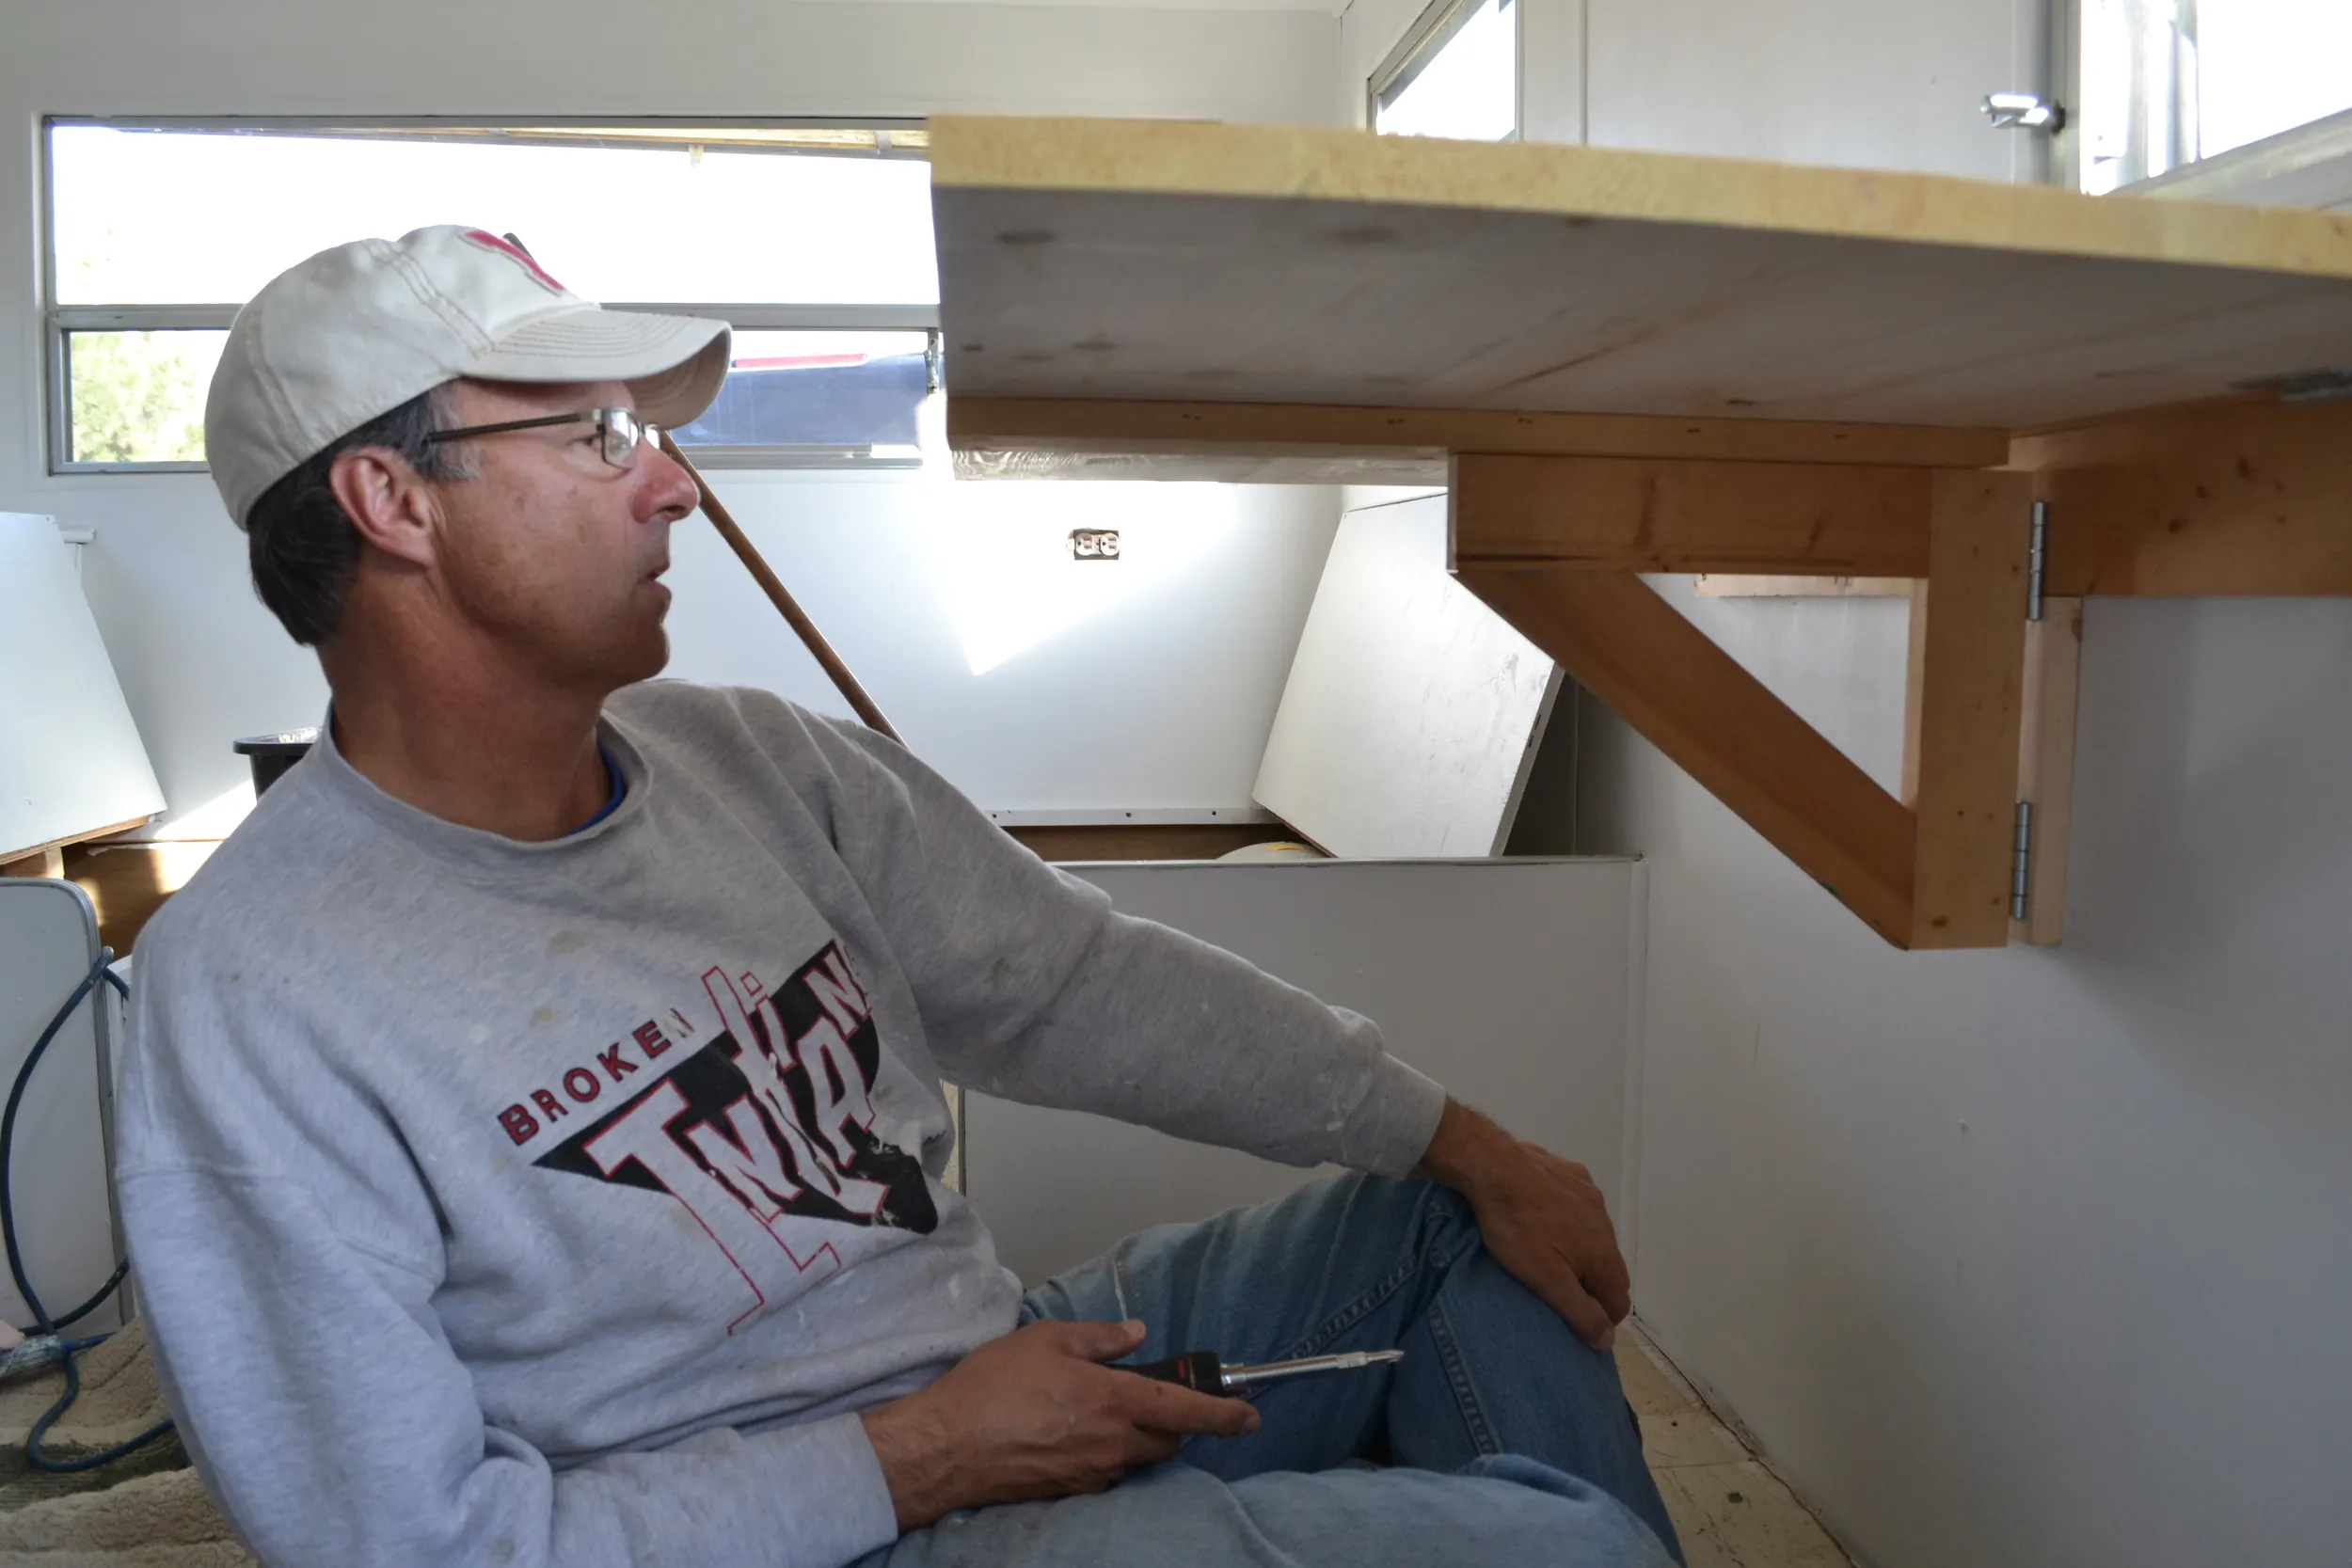 Triangle brace is in. Everything's sitting pretty — now we just have to secure it with the wood peg. 
6. The Finishing Touches:
- Sand, Stain, Seal: Give your desk a smooth finish and protect it with polyurethane. This is a great time to get creative with paint or stain!
- Rounded Corners: Optional, but highly recommended (especially for us klutzes!). Trace a circular object for a perfect curve.
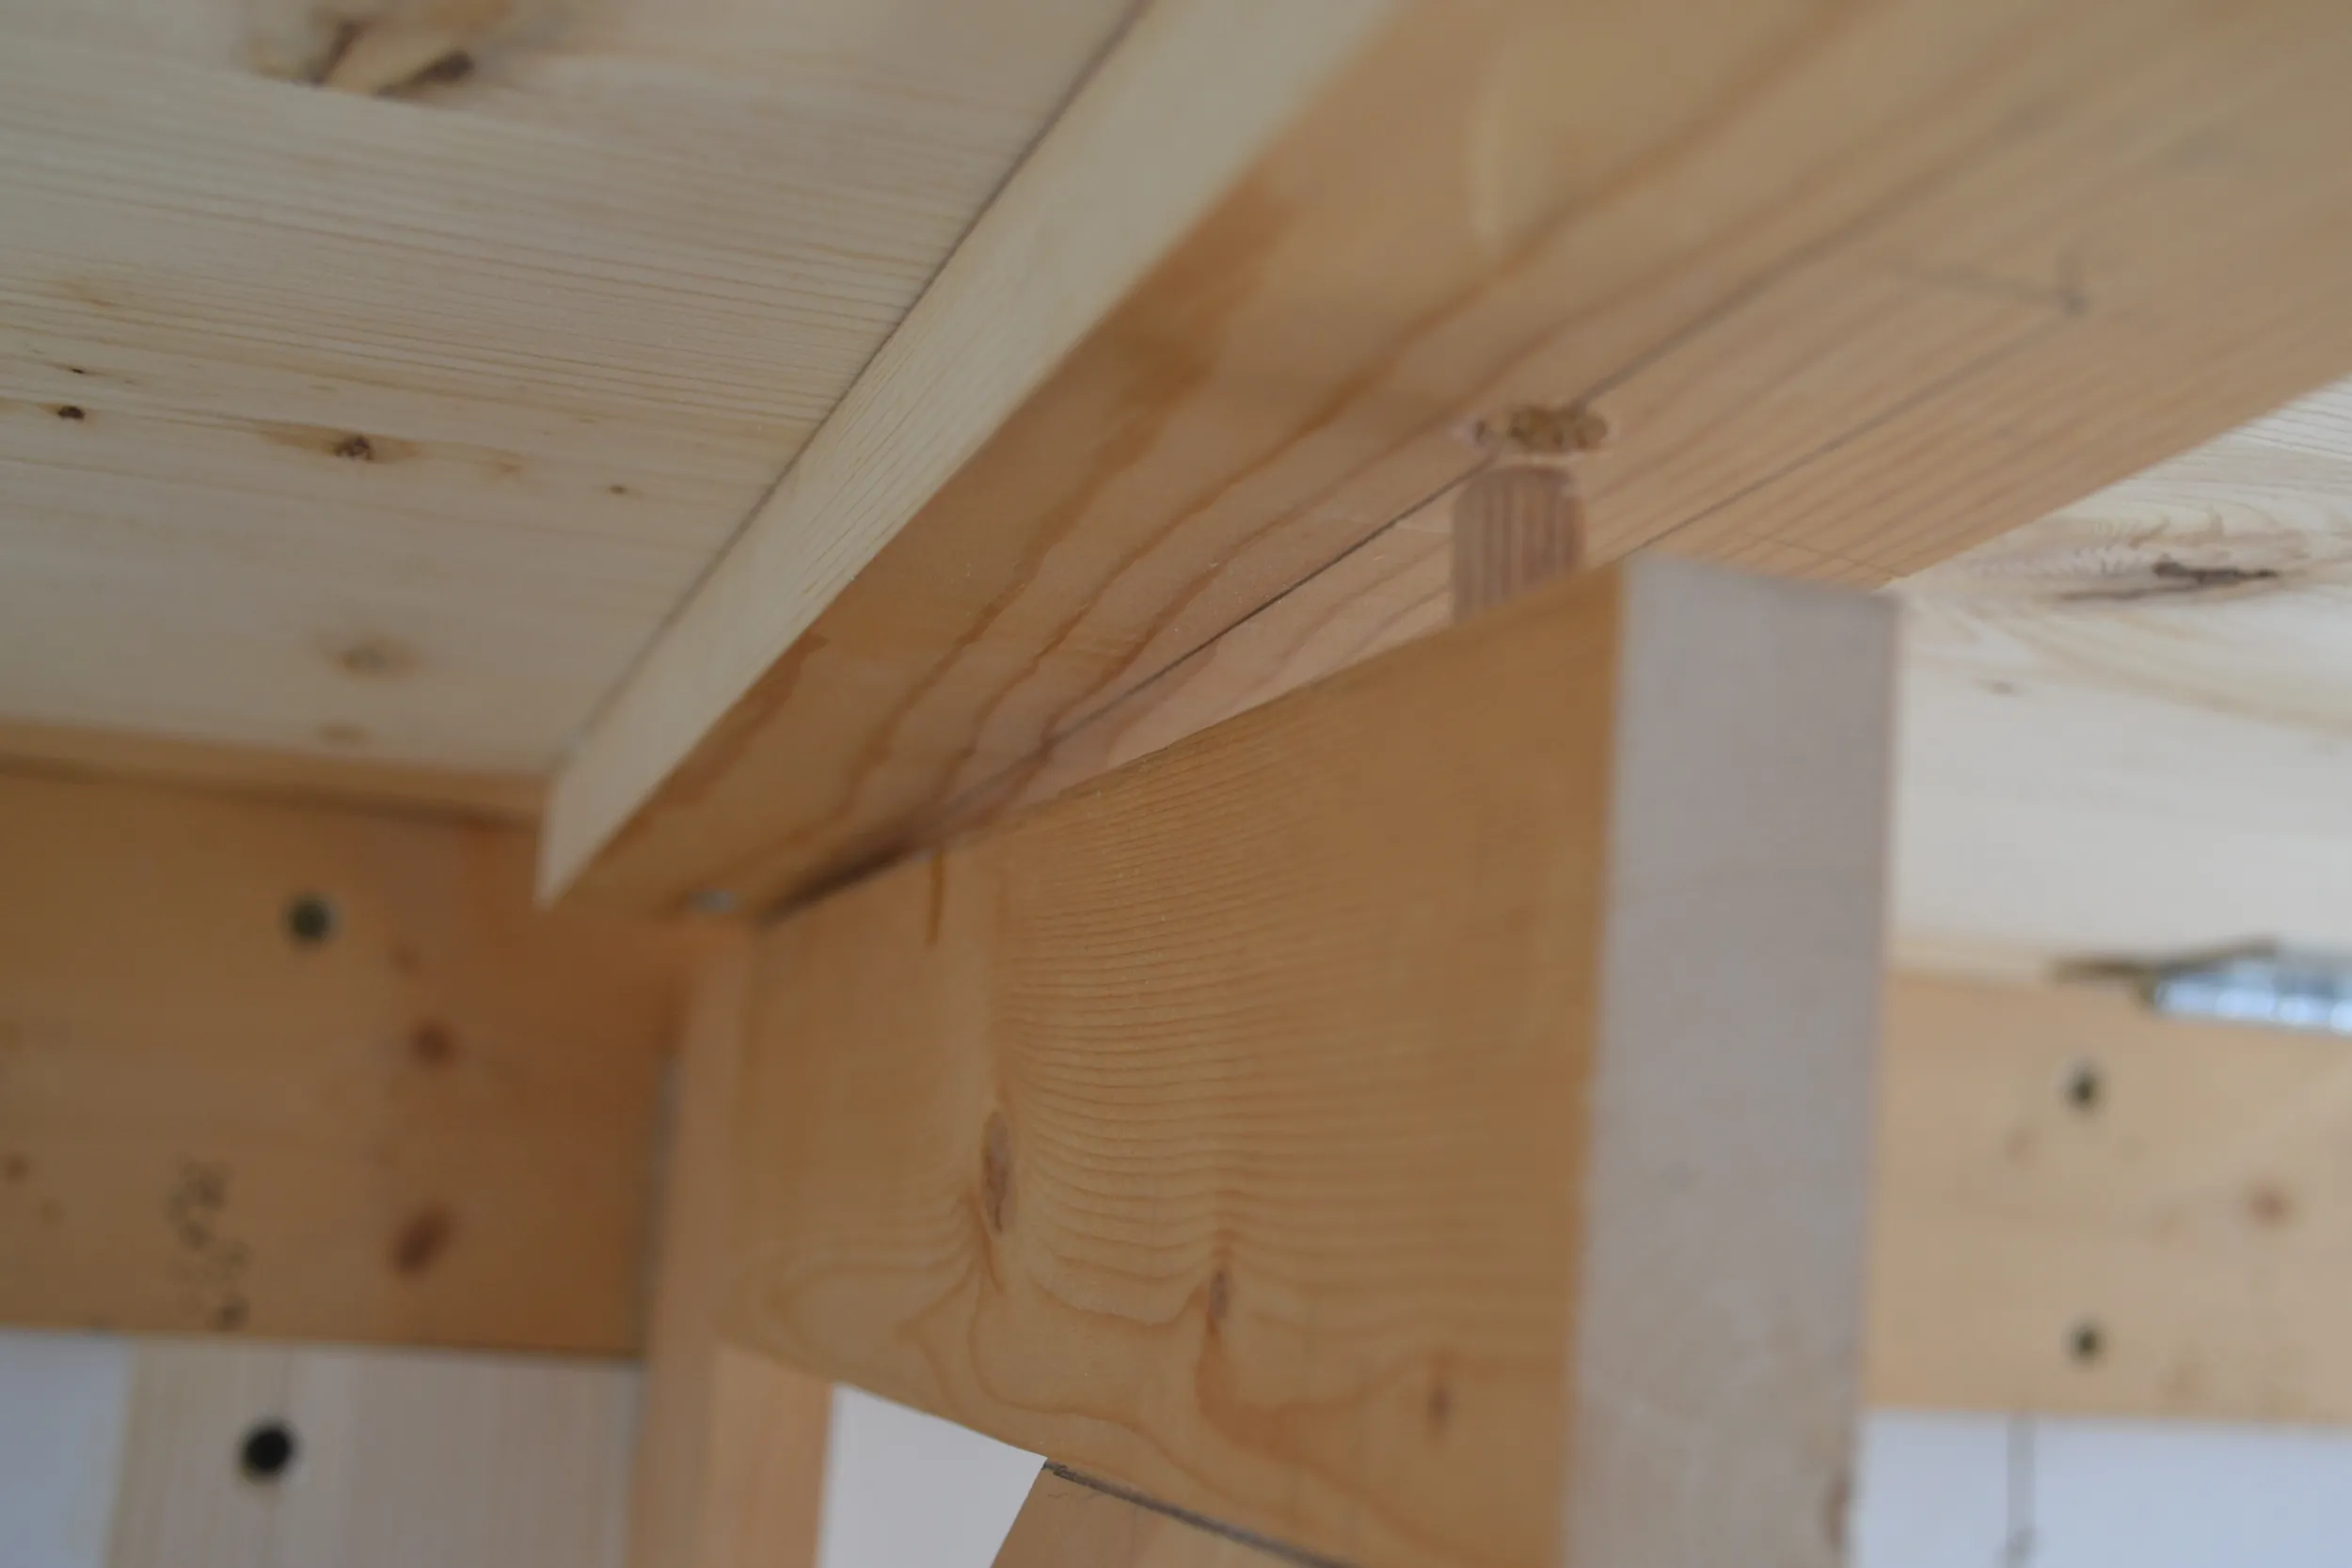 The very, very important wood peg!
7. Admire Your Handiwork:
 Voila! Your desk is complete.
Congratulations, you’ve officially conquered the DIY fold-down desk! Not only have you maximized your craft space, but you’ve also created a unique piece that reflects your personal style.
Robert Kline Art: Your Source for Handmade Inspiration
I hope this DIY project has inspired you to tackle your own space-saving solutions. Remember, the beauty of crafting lies in its ability to transform ordinary spaces into extraordinary reflections of our creativity.
Want more crafty goodness? Be sure to explore the rest of the Robert Kline Art website for unique handmade gifts, tips, and inspiration. And don’t forget to share your creations – tag us on social media; we’d love to see your masterpieces!
