Blog
Building the Perfect Vinyl Record Storage: A DIY Guide

As an artist, I understand the importance of cherishing your tools of the trade. For music lovers, vinyl records are more than just tools, they’re artifacts, stories waiting to be spun. But with a growing collection comes the need for proper storage. That’s why I’m excited to share my DIY vinyl record storage solution – a blend of practicality and style that any music aficionado would be proud to own.
Why DIY Vinyl Record Storage?
Sure, you can find pre-made storage solutions, but where’s the fun in that? Building your own vinyl record storage allows you to:
- Customize: Tailor the size, shape, and finish to perfectly match your space and style.
- Save Money: DIY is often more budget-friendly than buying pre-built furniture.
- Gain Satisfaction: The feeling of accomplishment after building something with your own hands is unparalleled.
Planning Your Vinyl Record Storage Unit
Before you grab your tools, consider these factors:
- Capacity: How many records do you need to store? Plan for future additions to your collection.
- Dimensions: Measure your space carefully to ensure a good fit.
- Design: Choose a design that complements your existing décor.
Tools and Materials: Gearing Up For Success
Having the right tools can make your DIY journey smooth and enjoyable. Here’s what I recommend:
Tools:
- Circular Saw: For making clean and accurate cuts on plywood.
- Drill: Essential for creating pilot holes and driving screws.
- Impact Driver: Provides extra torque for securing screws quickly and efficiently.
- Pocket Hole Jig: Optional, but recommended for creating strong and discreet joints.
- Oscillating Multi-tool: Perfect for sanding in tight spaces.
- Measuring Tape, Pencil, Safety Glasses
Materials:
- Plywood: The workhorse of this project. Choose a thickness that provides adequate support for your records.
- Wood Glue: Adds extra strength and stability to your joints.
- Wood Screws: Choose the appropriate length and type for your materials.
- Hairpin Legs: Adds a touch of mid-century modern flair (or choose your preferred style).
- Sandpaper: For smoothing out rough edges and preparing for finishing.
- Wood Finish: Protects your creation and enhances its natural beauty.
Building Your Vinyl Record Storage Unit: A Step-by-Step Guide
Ready to get your hands dirty? Let’s build!
-
Cut the Plywood: Follow your chosen plan to cut the plywood pieces for the sides, top, bottom, shelves, and any supports.
-
Assemble the Frame: Use wood glue and pocket screws (or your preferred joinery method) to assemble the main frame of the unit.
-
Add Shelves: Attach the shelves using wood glue and screws, ensuring they are level and evenly spaced.
-
Reinforce the Structure: Add additional supports underneath the shelves and a back panel if desired for added stability.
-
Sand and Finish: Sand all surfaces smooth, paying attention to edges and corners. Apply your chosen wood finish according to the manufacturer’s instructions.
-
Attach the Legs: Once the finish is dry, attach the hairpin legs (or your chosen leg style) securely to the base of the unit.
-
Load it Up: Time for the best part! Carefully arrange your vinyl collection in your new custom storage unit.
Robert Kline Art’s Pro Tips for DIY Success:
- Measure Twice, Cut Once: Accuracy is key in carpentry. Double-check your measurements before making any cuts to avoid costly mistakes.
- Invest in Quality Tools: While it might be tempting to go for the cheapest option, investing in quality tools will pay off in the long run with better performance and longevity.
- Don’t be Afraid to Experiment: This guide provides a framework, but feel free to add your own personal touches and modifications.
Conclusion: The Sweet Sound of Success
Building your own DIY vinyl record storage is a rewarding experience that combines creativity, craftsmanship, and a love for music. It’s about creating a functional and stylish piece that reflects your personal style while keeping your treasured vinyl collection organized and protected for years to come.
So, what are you waiting for? Dust off your tools, gather your materials, and let’s get building!
And don’t forget to share your creations with me – tag @robertklineart on social media. I can’t wait to see what you build!
Looking for more unique, handmade gift ideas? Explore the Robert Kline Art website for a curated collection of one-of-a-kind pieces.
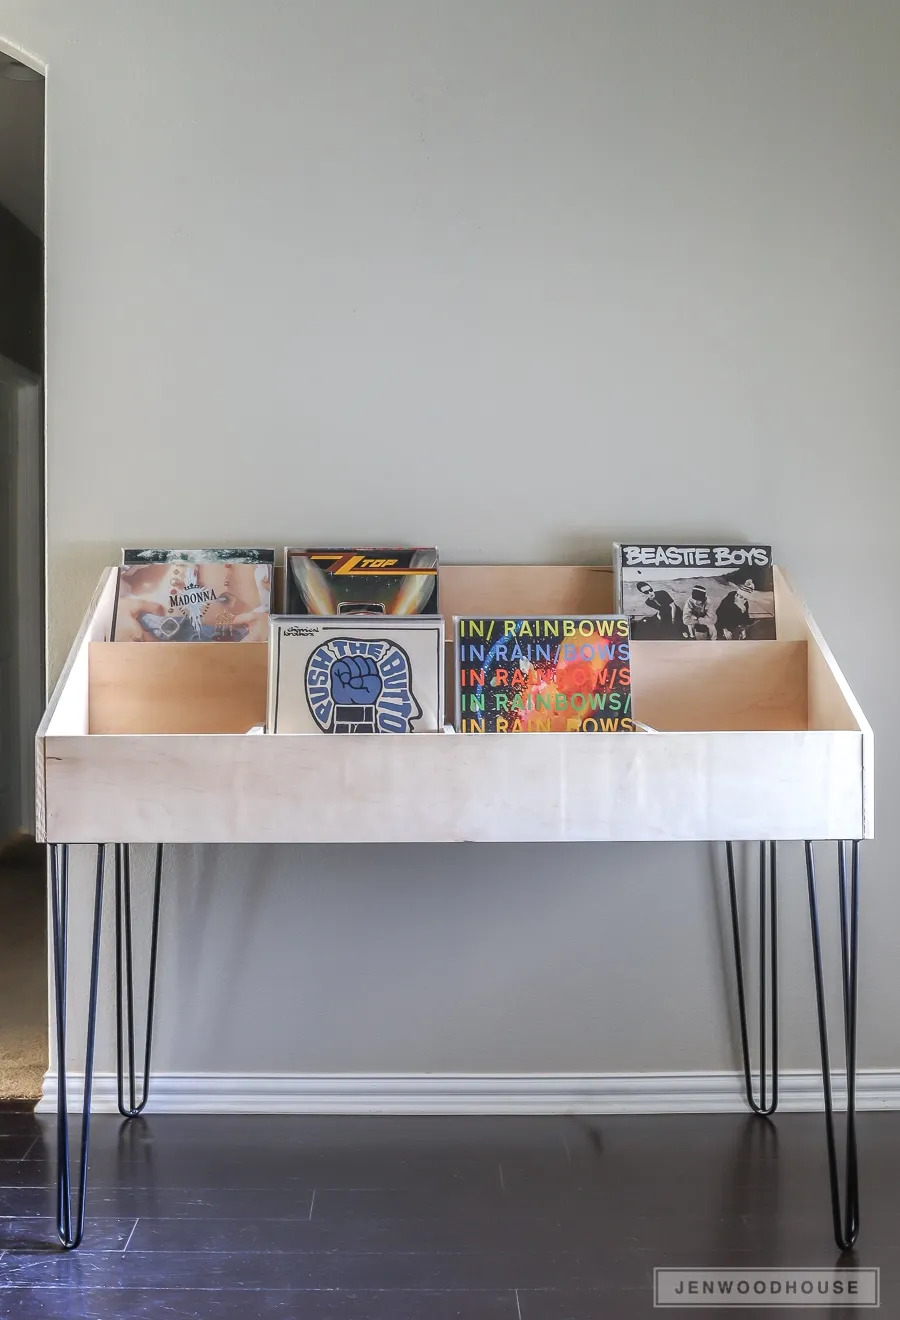
 How to build a DIY vinyl record cabinet storage display
A finished DIY vinyl record storage unit, showcasing a collection of records.
