Blog
How to Build an Outdoor Bar with a Built-In Cooler
Summer is here, and what better way to enjoy the outdoors with friends and family than with a custom-built outdoor bar? Imagine serving refreshing drinks without stepping foot inside. That’s the dream, and with a bit of woodworking, it can be yours! This step-by-step guide will walk you through building an outdoor bar with a built-in cooler, perfect for entertaining. This project is great for any skill level, and I’m here to help you bring the “bar” to your backyard.
Materials You’ll Need
Before we get started, here’s a list of everything you’ll need:
Lumber:
- Douglas Fir:
- 7 pieces of 2″ x 3″ x 8′
- Common Pine:
- 1 piece of 1″ x 4″ x 10′ (for trim)
- 2 pieces of 1″ x 12″ x 12′
- 4 pieces of 1″ x 12″ x 8′
- Pressure-Treated Plywood:
- 1 sheet of 72″ x 25″ x 3/4″ (for the bar top)
Other Materials:
- 48-quart cooler
- Exterior wood screws (various lengths)
- Wood glue
- Outdoor wood stain (your choice of color)
- Sandpaper (80, 120, and 220 grit)
- Measuring tape
- Pencil
- Saw (circular saw or miter saw recommended)
- Drill
- Screwdriver
- Level
- Safety glasses
- Work gloves
Building Your Outdoor Bar
Step 1: Creating the Basic Frame
Let’s start with the bones of our bar.
- Cut the Supports: Take two of your 2″ x 3″ x 8′ Douglas fir pieces and cut them down to 56 1/2″. From the remaining wood, cut two more pieces at 38 1/2″.
- Cut More Supports: Take another two of the 8′ Douglas fir pieces and cut two more 38 1/2″ sections. From the leftovers, cut four 20″ sections.
- Assemble the Frame: Now, arrange these cut pieces to form the basic rectangular frame of your bar. The 56 1/2″ pieces will be the longer sides, and the 38 1/2″ pieces will be the shorter sides. Use wood glue and screws to secure the corners, making sure they are at perfect 90-degree angles.
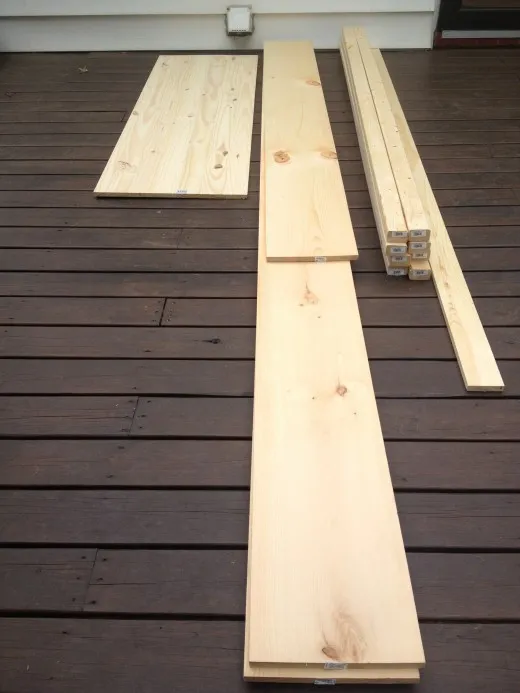
 Supplies for outdoor bar
Step 2: Adding Support Beams
A sturdy bar needs sturdy support. Here’s how to add them:
- Cut Additional Supports: From your remaining 2″ x 3″ Douglas fir, cut one piece at 15″ and another at 16″. You’ll also need three more pieces cut down to 53 1/2″.
- Install the Supports: Working on the back of the bar frame, attach one 53 1/2″ support piece horizontally between the two rear vertical supports (the 38 1/2″ pieces). Make sure the bottom of this support is 14″ from the top of the vertical supports.
- Repeat: Install the other two 53 1/2″ support pieces in the same way, one above the other, to create three horizontal supports.
- Vertical Support: Install the 16″ piece vertically between the top two horizontal supports, 27 1/4″ from the left side of the frame.
- Final Support: Install the 15″ piece vertically directly below the 16″ piece, connecting the middle and bottom horizontal supports.
 Slide1
Step 3: Enclosing the Bar
Let’s give our bar some style and create a finished look.
- Cut the Panels: Take the two 1″ x 12″ x 12′ common pine boards and one 1″ x 12″ x 8′ board. Cut these into nine sections of 39 1/4″.
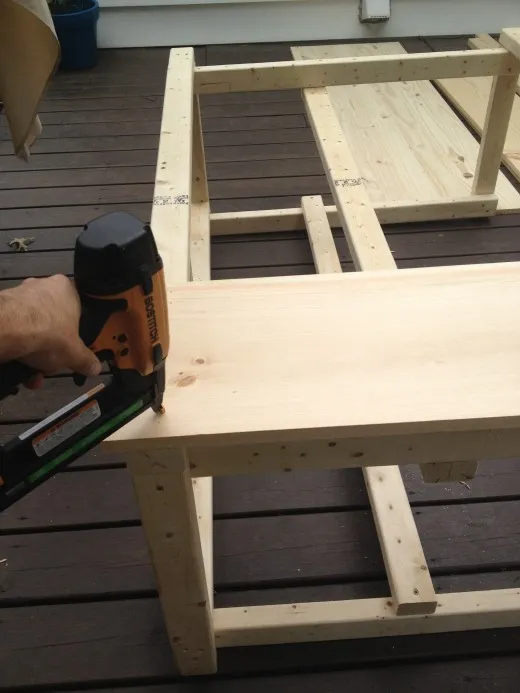
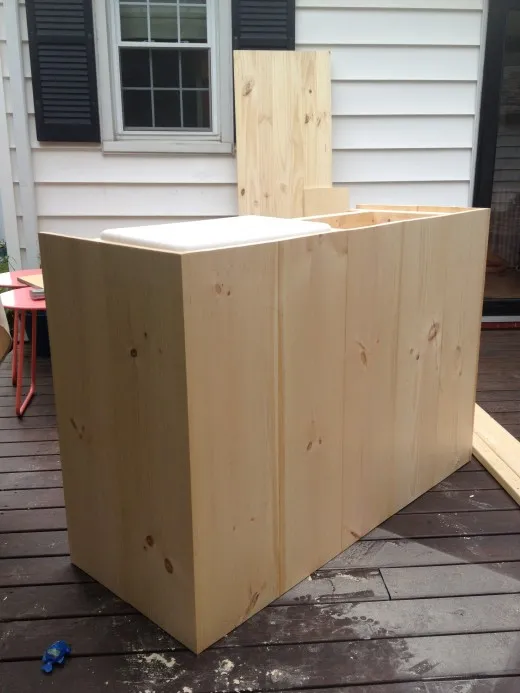
- Attach the Panels: Lay the bar frame on its back. Attach the nine panels to the outer frame, creating a “skin” for the bar. Five panels will go across the front, and two will go on each side. Ensure the bottom edges of these panels are flush with the bottom of the frame, creating a 3/4″ overhang at the top.
 Slide1
Step 4: Adding the Shelf
Time for a shelf to hold those essential bar tools and maybe a few decorations!
- Cut the Shelf: From your remaining 1″ x 12″ common pine, cut a piece to 21 1/2″ for the shelf.
- Install the Shelf: Attach the shelf to the supports inside the bar frame. The exact height is your preference, but ensure it’s level.
 buildingsides
 sidescompleted
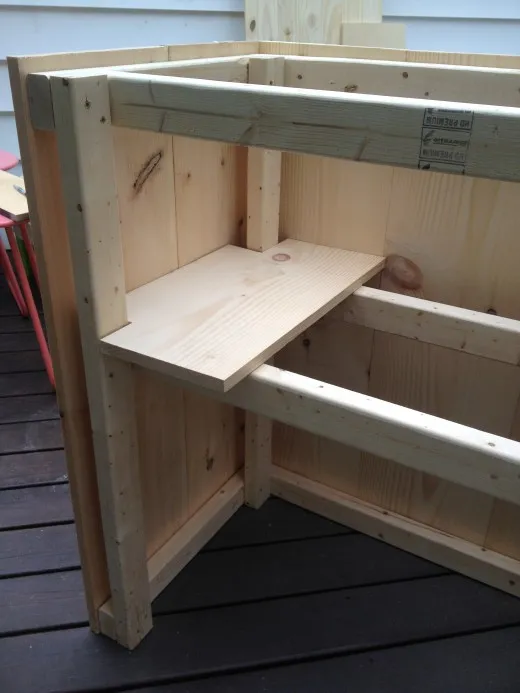 cutoutonshelf
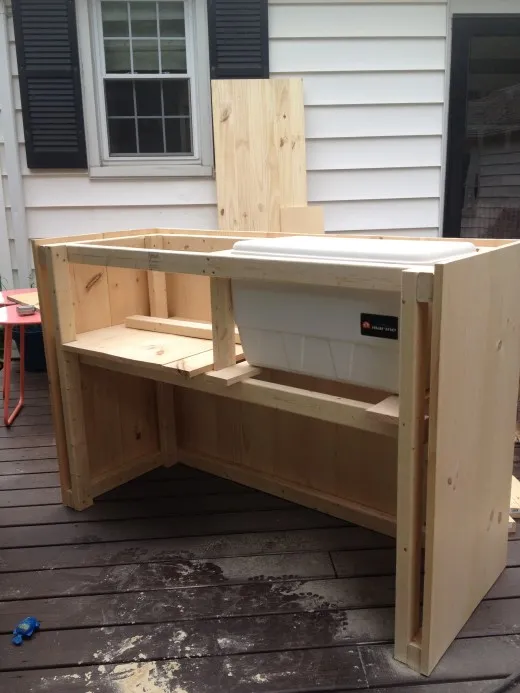 OUTDOORBARSHELF
Step 5: Framing the Cooler Lid
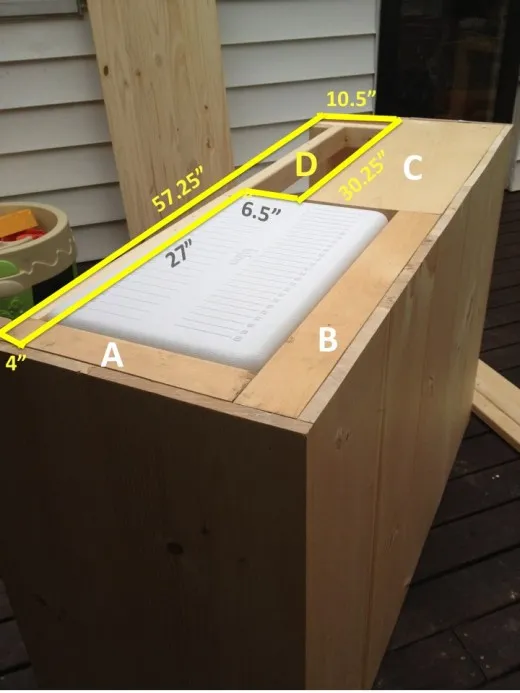
- Cut the Frame Pieces: You’ll need to cut four pieces from a 1″ x 12″ common pine board for the cooler lid frame:
- Piece A: 14 1/2″ x 2 1/2″
- Piece B: 26 1/2″ x 3″
- Piece C: 30 1/4″ x 11 1/4″
- Piece D: For this piece, refer to the photo below for the exact dimensions and cut.
 Slide1
Step 6: Building the Bar Top
Now for the star of the show—the bar top!
- Cut the Plywood: Take your 72″ x 25″ x 3/4″ pressure-treated plywood sheet. Measure and mark two sections on it: one for the fixed part of the bar top and the other for the hinged part that will cover the cooler. The exact dimensions will depend on your cooler’s size and the desired overhang.
- Cut the Opening: In the section that will cover the cooler, carefully cut an opening slightly smaller than the cooler’s top.
- Attach the Cooler Top (Optional): If desired, you can attach the cooler’s lid to the underside of this cutout section. This will allow the lid to swing open with the bar top.
- Trim: Cut two pieces of 1″ x 4″ x 10′ common pine to 22 1/2″ each (for the sides) and one piece to 59 1/2″ (for the front).
- Attach the Trim: Attach these trim pieces to the edges of the bar top sections, creating a neat and finished look.
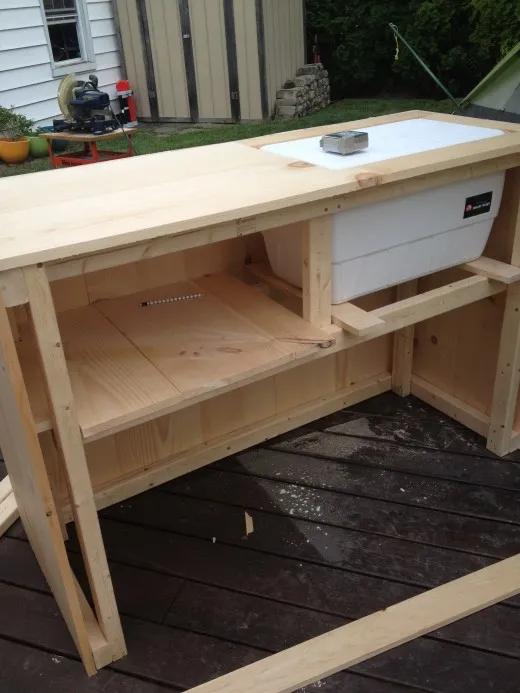 topofcooler
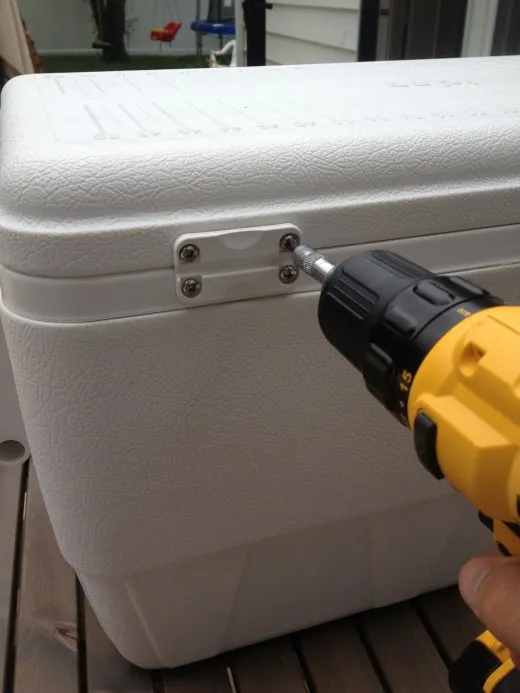 unhingecooler
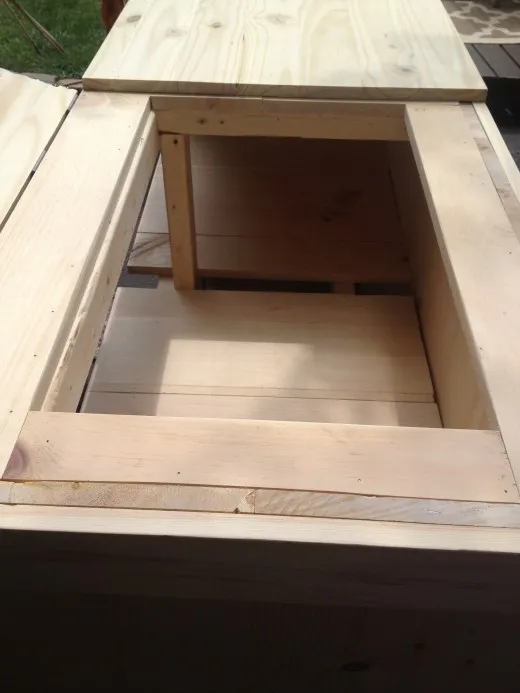 finishedtop
Step 7: Sanding and Staining
Let’s give your bar that professional touch.
- Sanding: Sand down all the surfaces of your bar, starting with a coarser grit sandpaper (80) and gradually moving to a finer grit (220).
- Staining: Apply your chosen outdoor wood stain according to the manufacturer’s instructions. You can use a brush, roller, or sprayer for this step. Allow ample drying time.
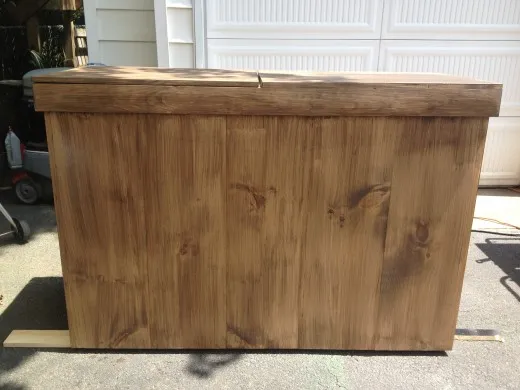 finishedstain
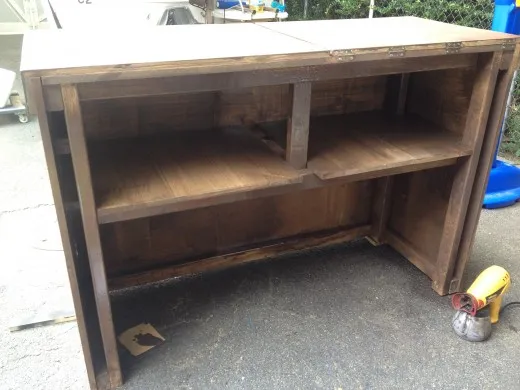 finishedstainbackside
Step 8: Enjoy Your New Outdoor Bar!
Congratulations! You’ve built your very own outdoor bar with a built-in cooler. It’s time to stock it up, invite your friends and family over, and enjoy the fruits of your labor.
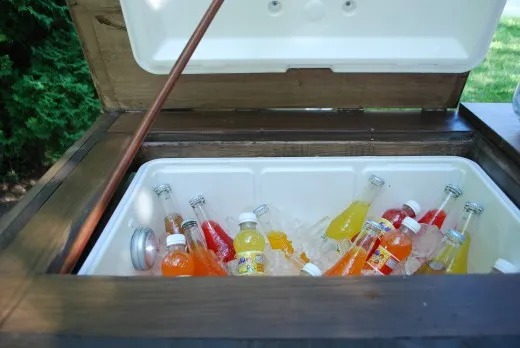 outdoor bar with built in cooler
 outdoor bar with built in cooler
 outdoor bar with built in cooler
 outdoor bar with built in cooler
 outdoor bar with built in cooler
 outdoor bar with built in cooler
 outdoor bar with built in cooler
 outdoor bar with built in cooler
 DSC_0408
 DSC_0418
Tips from Robert Kline Art
- Customize It: Feel free to adjust the dimensions and design to fit your space and preferences. You can add additional shelves, hooks for bar tools, or even a small sink.
- Safety First: Always wear safety glasses and work gloves while using power tools.
- Choose the Right Lumber: Use pressure-treated lumber for any parts of the bar that will be in direct contact with the ground to prevent rot.
- Finishing Touches: Get creative with the finishing touches! Add a coat of paint, stain, or even tile to the bar top for a personalized look.
Building your own furniture is incredibly rewarding. It allows you to add a personal touch to your home and create something unique. If you’re looking for other DIY projects, be sure to check out the amazing ideas on Robert Kline Art. Remember, the most important ingredient in any craft is to have fun! Happy building!
