Blog
Building a Custom L-Shaped Desk with File Cabinets: A Step-by-Step Guide

Hey there, fellow DIY enthusiasts! Robert Kline here, and today we’re diving into a project that’s near and dear to my heart – building a custom L-shaped desk using file cabinets. This is a fantastic way to create a functional and stylish workspace without breaking the bank. Plus, it’s a project that allows you to unleash your creativity and customize the desk to your liking.
From Humble Beginnings to an Amazing Desk
This project was inspired by a recent file cabinet makeover I completed. Remember those ordinary metal file cabinets you find at thrift stores? Well, we gave them a new lease on life by transforming them into the base of a fantastic L-shaped desk.
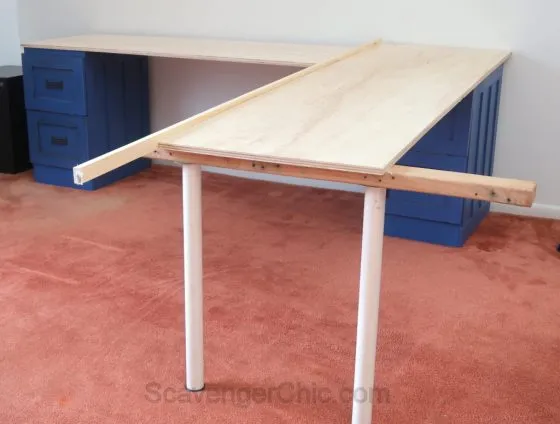
 Metal File Cabinet Desk. L shaped desk with shutter corner-002
Gathering Your Materials
Before we get started, let’s make sure you have all the necessary materials. For this project, you will need:
- Two file cabinets: These will form the base of your desk. I recommend choosing cabinets that are sturdy and in good condition.
- A piece of plywood: This will be your desktop. I used a 4’x8′ sheet of ¾” sanded plywood.
- 1″x2″ lumber: You’ll need enough to encircle your desk.
- Wood glue: This will help secure the plywood to the file cabinets.
- Screws: Make sure you have screws that are the appropriate length for your file cabinets and plywood.
- Wood putty: This will be used to fill in any screw holes.
- Paint or stain: Choose your desired finish for the desktop.
- Polyurethane or varnish: This will protect your finish and make it more durable.
Step-by-Step Instructions:
1. Preparing the File Cabinets
Before you can start building your desk, you’ll need to prepare the file cabinets. If they’re looking a little worse for wear, give them a fresh coat of paint or stain. This is a great opportunity to add your personal touch and choose colors that complement your workspace.
Pro Tip: “When choosing paint or stain for your file cabinets, consider the overall style of your workspace,” advises interior designer Sarah Thompson. “For a modern look, go with a sleek white or black finish. If you prefer a more rustic vibe, opt for a distressed wood stain.”
2. Creating the Desktop
Measure the dimensions of your desired desktop, taking into account the size of your file cabinets and the desired overhang. Cut the plywood to size. You can have this done at your local hardware store if you don’t have the necessary tools.
3. Attaching the Desktop
Apply a generous amount of wood glue to the top of the file cabinets. Carefully position the plywood desktop on top, ensuring it’s centered and aligned with the edges of the cabinets. Use clamps to secure the plywood while the glue dries.
4. Adding Support and Finishing Touches
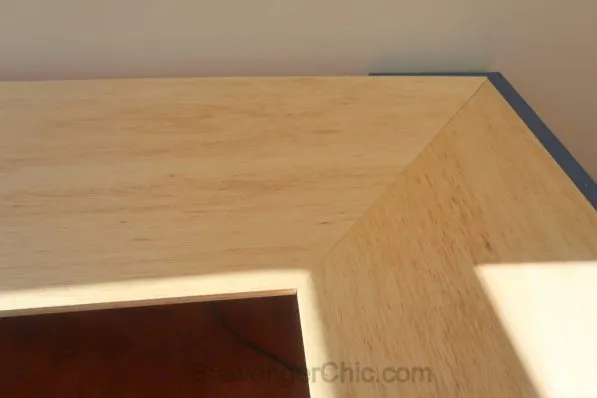
To provide extra support and prevent the plywood from sagging, attach the 1″x2″ lumber around the edges of the desktop using screws. Miter the corners for a polished look. Fill in any screw holes with wood putty and sand smooth.
5. Adding a Personal Touch
Now comes the fun part – adding your personal touch! You can paint or stain the desktop to match your desired aesthetic. I chose to use a vintage wax for a warm and inviting finish.
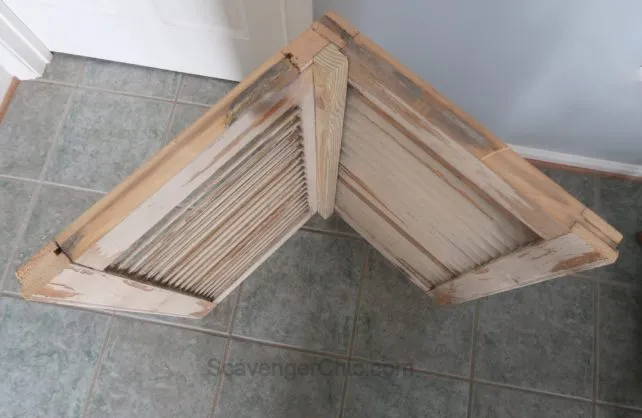
 Metal File Cabinet Desk. L shaped desk with shutter corner-001
Customizing Your L-Shaped Desk:
Here’s where things get really exciting. You can further customize your L-shaped desk by adding:
- A corner support: A sturdy corner support, like a wooden post or a metal bracket, is crucial for stability, especially if you plan on using the corner area frequently.
- Shelving: Install shelves above the desk to maximize storage space and keep your workspace organized.
- A keyboard tray: This ergonomic addition can help prevent wrist strain and improve your posture.
- Cable management solutions: Keep your cords tidy and out of sight with cable clips, sleeves, or a dedicated under-desk cable management system.
 Metal File Cabinet Desk. L shaped desk with shutter corner-004
Conclusion: Enjoy Your New Workspace
Building a custom L-shaped desk with file cabinets is a rewarding project that allows you to create a workspace that’s both functional and stylish. With a little creativity and effort, you can transform ordinary materials into a unique and personalized desk that meets your specific needs and preferences.
So why not give it a try? I’d love to see what you create. Share your finished projects with me on social media or in the comments below. And don’t forget to explore Robert Kline Art for more inspiring DIY ideas and unique handmade gifts.
