Blog
Building a Dream Greenhouse with Recycled Windows: A Step-by-Step Framing Guide

The dream of having a sun-drenched haven filled with thriving greenery has finally taken root! My vision for a charming, vintage-style greenhouse, built with recycled windows, is starting to blossom. Join me as I walk you through our journey of building a backyard greenhouse from scratch, starting with the essential framing.
Designing Our Recycled Window Greenhouse: From Vision to Plan
Every masterpiece starts with a vision. For me, it was a greenhouse bursting with life, bathed in sunlight streaming through antique windows. But turning a dream into a reality meant grappling with the nitty-gritty of design and construction.
Finding the Perfect (Free!) DIY Greenhouse Plans
My initial quest was to unearth the ideal free DIY greenhouse plans online. While there are amazing resources out there, like the ones from Ana White, none quite matched the specific vision dancing in my head. Determined, we used these existing plans as a springboard and, armed with our knowledge of framing and a healthy dose of DIY spirit, decided to create our own.
SketchUp to the Rescue: Bringing Our Greenhouse to Life in 3D
Enter SketchUp, the free 3D modeling software that has become our trusty sidekick for countless projects. This powerful tool allowed us to experiment with different designs and visualize how our greenhouse would look and function. While there’s definitely a learning curve, the ability to see our plans in 3D proved invaluable.
Building a Greenhouse on a Budget: Our Materials List
With a clear vision and the tools to design, it was time to tackle the materials. Using recycled windows was a non-negotiable, injecting character and sustainability into our project. We also opted for affordable, yet durable, corrugated polycarbonate sheets for the roof, ensuring ample light transmission without breaking the bank.
From Paper to Progress: Building the Greenhouse Frame
With a finalized design in hand, the excitement of seeing our greenhouse take physical shape was palpable.
Location, Location, Location: Finding the Perfect Spot
Before breaking ground, we meticulously surveyed our property. Factors like sunlight exposure, accessibility, and proximity to other structures came into play. It was essential to find a spot that not only met the practical needs of our greenhouse but also harmonized with the surrounding landscape.
Greenhouse Size Matters: Striking the Perfect Balance
Determining the ideal size for our greenhouse was a delicate dance between available space and functionality. The dimensions needed to accommodate our desired layout, including seedling shelves, raised garden beds, and a comfortable workspace. After careful consideration, we settled on a footprint of 16 feet long by 10 feet wide, perfectly balancing our needs with the available area.
Ensuring Optimal Air Circulation: A Breath of Fresh Air for Our Plants
Proper ventilation is crucial for a thriving greenhouse environment. To prevent overheating and ensure healthy air circulation, we incorporated operable windows into our design. These windows, strategically placed on the gable ends, will provide a refreshing breeze on warm days while maintaining the desired temperature for our plants.
Building a Solid Foundation: The Greenhouse Frame Takes Shape
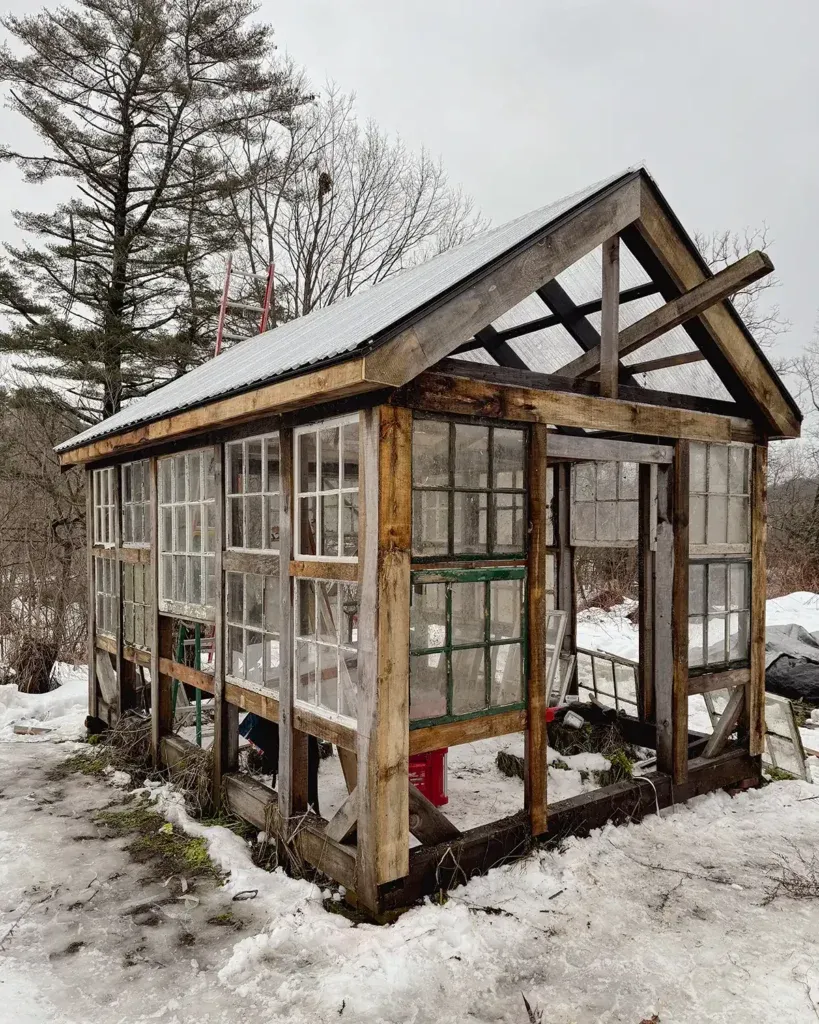
Using rough-cut lumber from a local sawmill, we began constructing the greenhouse frame. The satisfying rhythm of hammering and sawing filled the air as the skeletal structure began to emerge. We opted for a sturdy post and beam construction, ensuring long-lasting durability.
Here’s a quick rundown of our framing process:
- Setting the Base: We framed the base using durable 4×6 beams, creating a solid platform for the structure.
- Erecting the Corner Posts: Sturdy 4×4 posts were meticulously positioned at each corner, providing crucial vertical support. We braced these posts at the bottom for added stability.
- Adding the Studs: We carefully installed the studs, knowing we might need to make adjustments later to accommodate the unique dimensions of our salvaged window sashes.
- Building the Roof: To ensure a perfect fit and facilitate painting, we pre-built the roof structure on the ground. Once assembled and painted, we carefully lifted and secured it atop the frame.
- Installing the Cross-Members: Finally, we installed painted 1x material as cross-members, adding further strength and rigidity to the frame.
 Greenhouse building progress update for January with a roof installed and the window sash starting to go in
What’s Next?
With the framing complete, the real fun begins! Stay tuned as we delve into the exciting process of installing the recycled windows, adding finishing touches, and bringing our greenhouse dreams to life.
What about you? Have you considered building a greenhouse with recycled windows? Share your thoughts and questions in the comments below. I’d love to hear from you!
And be sure to check out the unique handmade gifts and DIY inspiration available at Robert Kline Art – perfect for adding a touch of handcrafted charm to your home and garden.
